How to Add New Hard Drive to Windows 10/11
Most Windows computers come with a single hard drive. But you may want to add a second hard drive if you are running out of disk space.
In this tutorial, I will show you how to add a new hard drive in Windows 10 and 11. I assume you have already physically attached the hard drive to your computer.
- Open Disk Management Tool - To open the Disk Management tool right-click on the Windows Start button and choose Disk Management. In the Disk Management tool, you should see your second hard drive is listed. If this is a new hard drive, the status will be "Not Initialized" and it will have a little red icon.

- Initialize Disk - Before we create new partitions, we need to Initialize the new disk. To initialize the disk, right-click on the disk label and select "Initialize Disk".

- Choose Partition style - You need to select a partition style—either MBR or GPT. Choose GPT if your computer has UEFI BIOS; otherwise, choose MBR. You can check if your computer uses UEFI by going to the System Information.
Check if Your PC Uses UEFI or Legacy BIOS in Windows 10/11

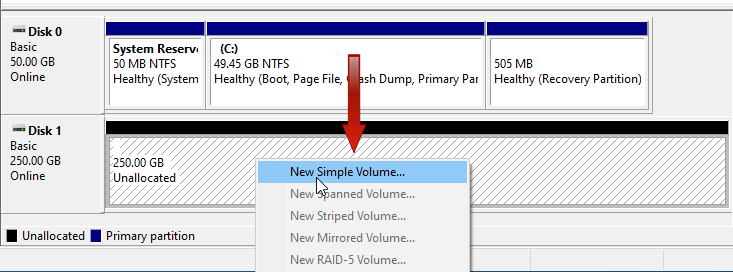
- Create a New Partition - Now we can create one or more windows partitions from our new disk. To create a partition, right-click on the unallocated space and select "New Simple Volume".
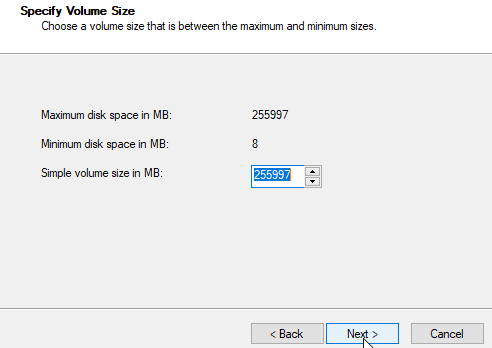
- Specify Partition Size - In the New Simple Volume Wizard, specify the size of the new partition. If you only want to create one partition, allocate the maximum available disk space.
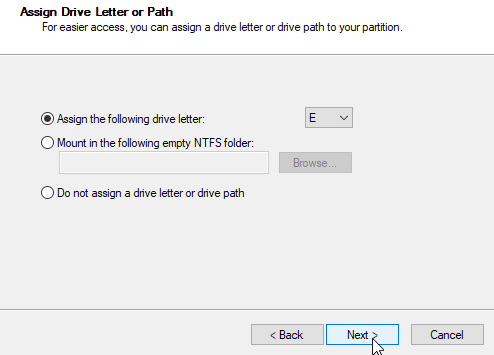
- Assign Drive Letter - Next, select a drive letter for the new Windows Partition.
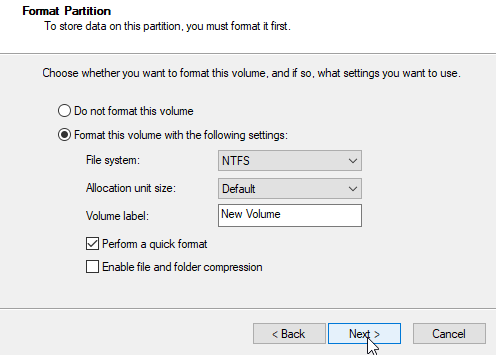
- Format Partition - Finally, select the file system type (NTFS) to create a new Windows 10 partition.
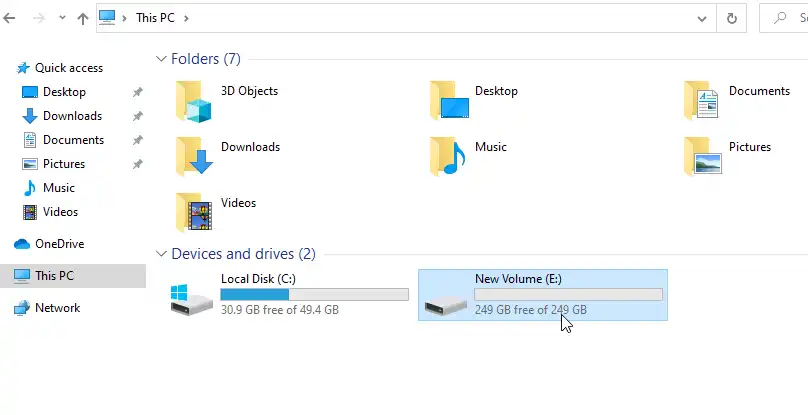
The new hard drive has been successfully added to Windows. The new partition is now available in File Explorer.
Summary - Add Hard Drive Windows 10/11
In this tutorial, we learned how to add a new hard drive to Windows 10 and Windows 11 using the Disk Management tool. First, we initialized the new hard drive, then created a new partition from the unallocated space.