How to Show Hidden Files in Windows 10
To show hidden files in Windows 10, while working in File Explorer, go to the View tab and activate the Hidden Items checkbox.

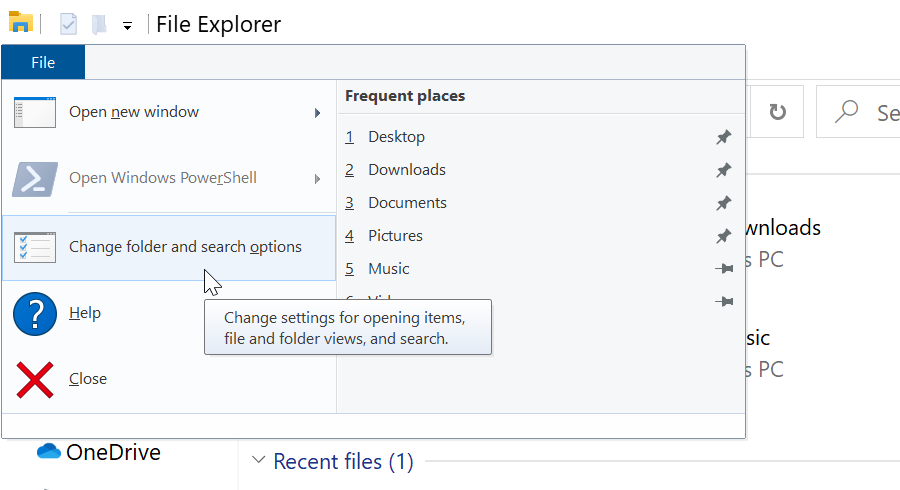
Alternatively, click File and then Change folder and search options.

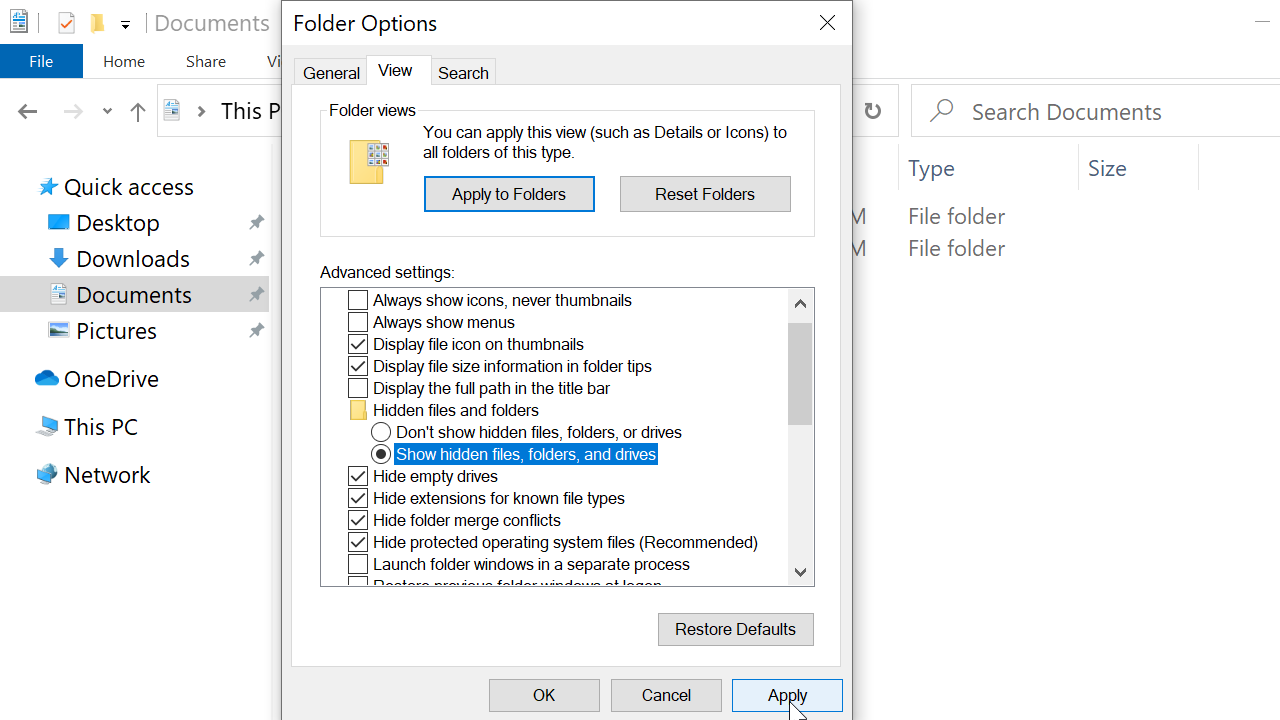
Click the View tab and enable the option Show hidden files, folders, and drives.

Optionally, you can uncheck the Hide protected operating system files checkbox to view protected system files, but this is not recommended unless you have a specific reason to do so.
Hidden files are light-colored compared to other items. It helps us to identify hidden files and folders faster.
Show Hidden Files in CMD
To show hidden files in CMD, open a command prompt and run the dir command as follows:
dir /a:hThe above command will display hidden files in the current directory. You can specify a path to view hidden files in a different folder:
dir /a:h C:\WindowsThe preceding command will show only the hidden files and folders. To view all files, run the dir command as follows:
dir /a C:\WindowsHow to Unhide Folders in Windows 10
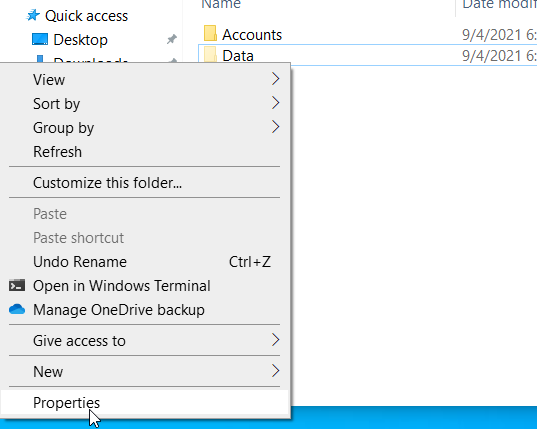
To unhide a folder, right-click the file or folder you want to unhide, and then click Properties.

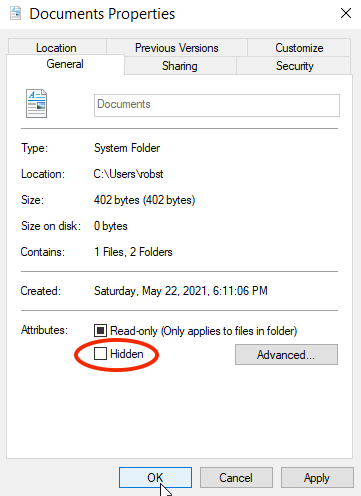
Clear the Hidden checkbox and click OK.

We can also unhide folders using the ATTRIB CMD command. The following example shows how it works:
attrib -h "C:\ProgramData"In the preceding example, we used ATTRIB to unhide a folder named ProgramData located in the C drive. Use the ATTRIB command with +h to hide files and folders from the command prompt.