How To Check if Virtualization Is Enabled in Windows 10 and 11
There are different ways to check if virtualization is enabled in Windows 10 and Windows 11. You can use either GUI (Task Manager and System Information Window) or Command Prompt (CMD or PowerShell).
Using Task Manager
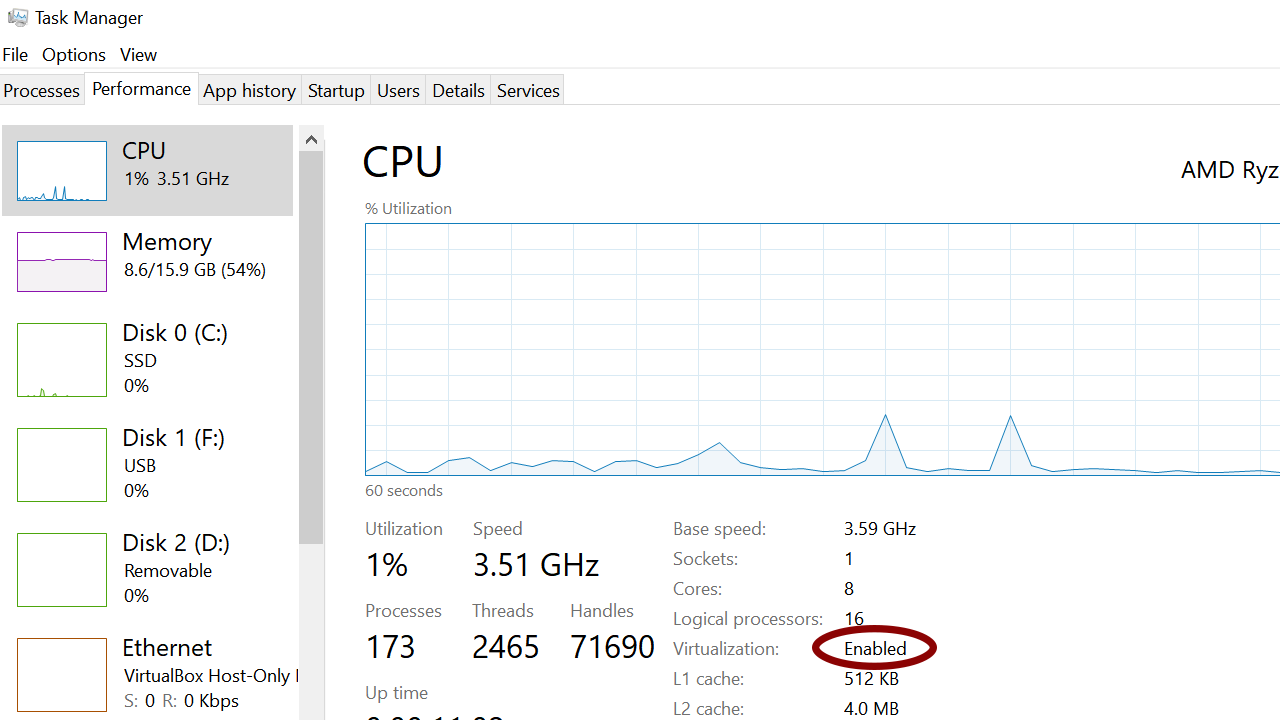
Open the Task Manager (Ctrl-Shift-Esc), go to the Performance tab, and click CPU. Virtualization is On if Virtualization shows up as Enabled below the CPU graph, as shown in the following screenshot:
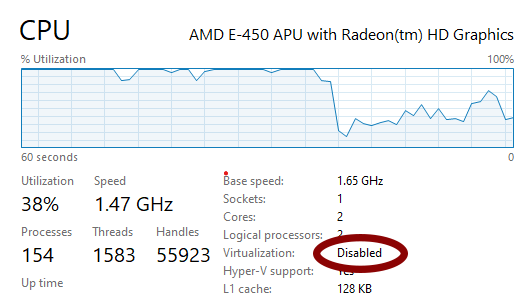
Virtualization is disabled if it appears as 'Disabled,' as shown in the following screenshot:
Using System Information Window
Open the System Information Window (click the Start button and type systeminfo), click on System Summary, then scroll down to the bottom and find the setting "Hyper-V - Virtualization Enabled in Firmware".
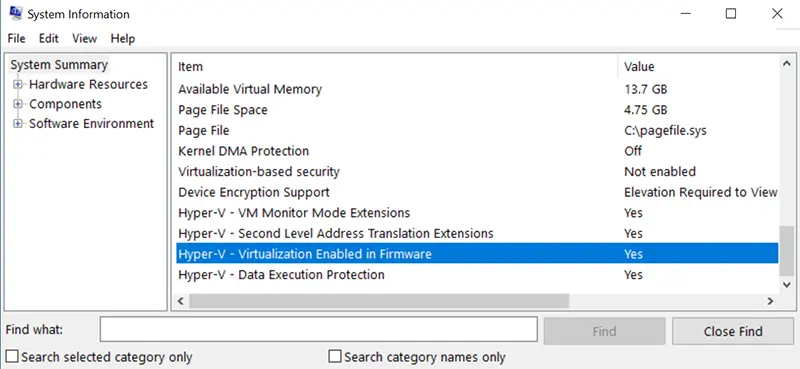
If the value is "Yes", then Virtualization is enabled on your Windows 10/11 computer.
Using CMD
You can get the same information from the command prompt. In the Windows Command Prompt (or PowerShell), you can run the following command:
systeminfo | findstr /i "virtualization"If the "Virtualization Enabled In Firmware" setting shows up as Yes, virtualization is enabled.

Using PowerShell
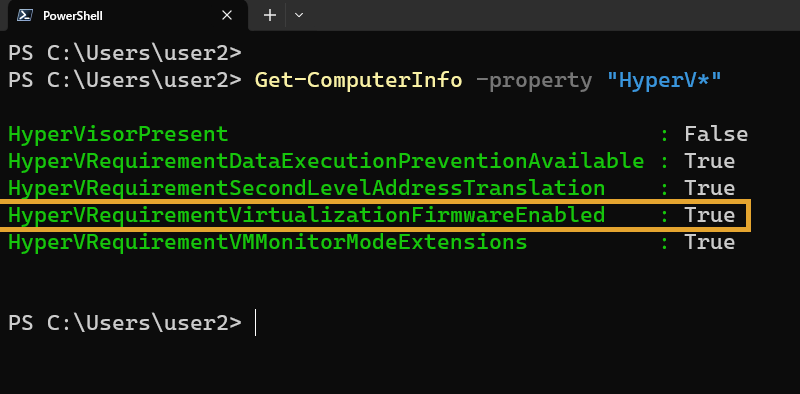
In Windows PowerShell, you can get the virtualization status by running the Get-ComputerInfo command. In the results, look for the property called HyperVRequirementVirtualizationFirmwareEnabled.
Get-ComputerInfo -property hyperv*Virtualization is enabled if the value is "True".
Enabling Virtualization
All modern CPUs (both Intel and AMD) support Virtualization. If Windows shows virtualization status as disabled, it is because it is disabled in BIOS.
Make sure that virtualization is enabled in your BIOS or UEFI settings. If your computer is based on an AMD processor, look for an option called SVM Mode inside BIOS.
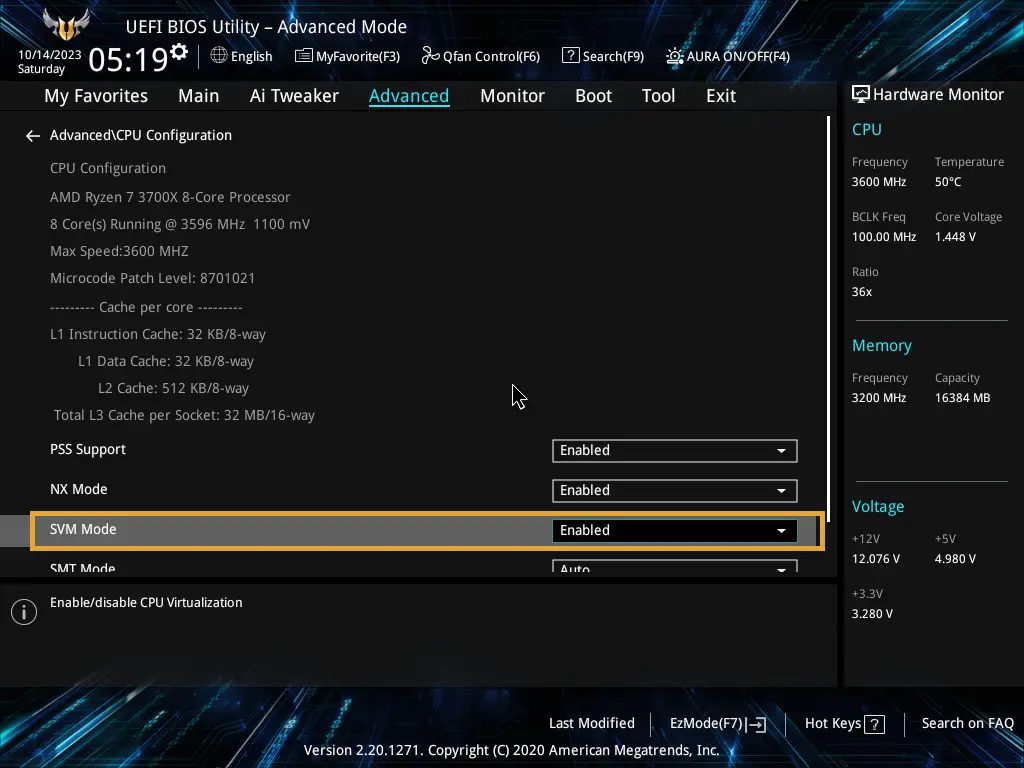
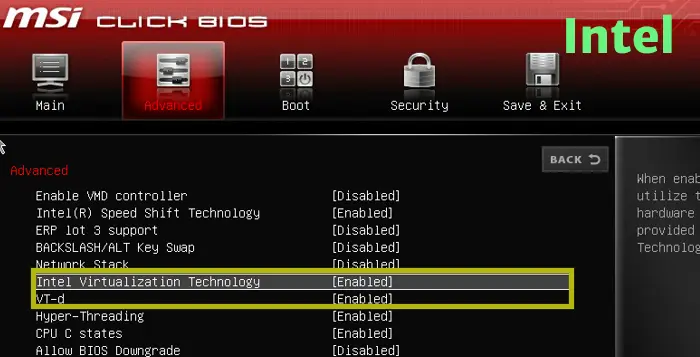
Intel processors have an option called Intel Virtualization Technology or VT-d, under the advanced BIOS settings.
