How To Change DNS Server Settings in Windows 10/11
By default, Windows is configured to receive DNS Server addresses from the DHCP server. However, you can change this behavior and manually configure DNS Settings.
The following section describes the steps for configuring DNS on Windows 10 using the graphical user interface.
Right-click the network icon on the notification area and choose Open Network and Internet settings.

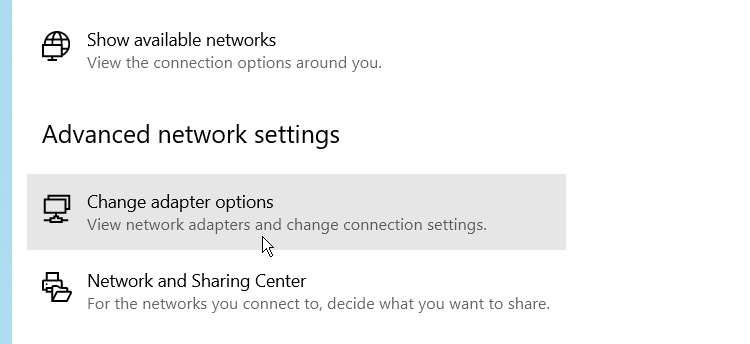
Next, click Change adapter options under the Advanced network settings. If you are on Windows 11, click the "More network adapter options" link.
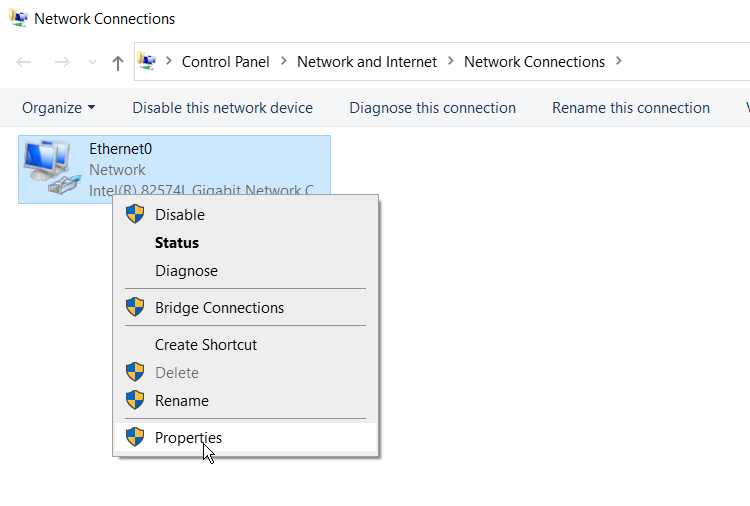
Next, right-click the active network interface and choose Properties from the contextual menu that appears.
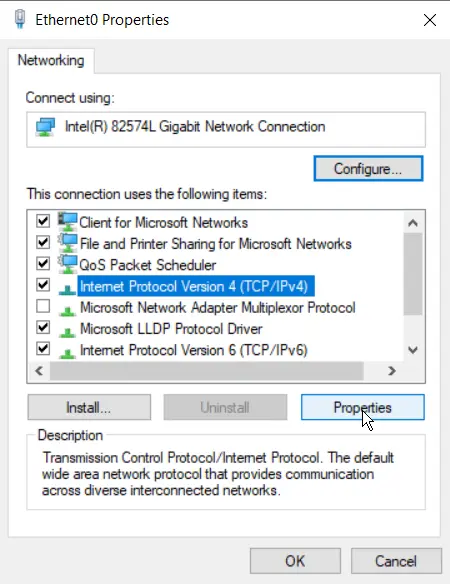
The properties dialog box for the network adapter appears. To configure DNS settings, select Internet Protocol Version 4 (TCP/IPv4) and then click the Properties button.
Switch to the "Use the following DNS Server addresses" radio button and then type the IP addresses of the DNS server in the Preferred DNS server box.
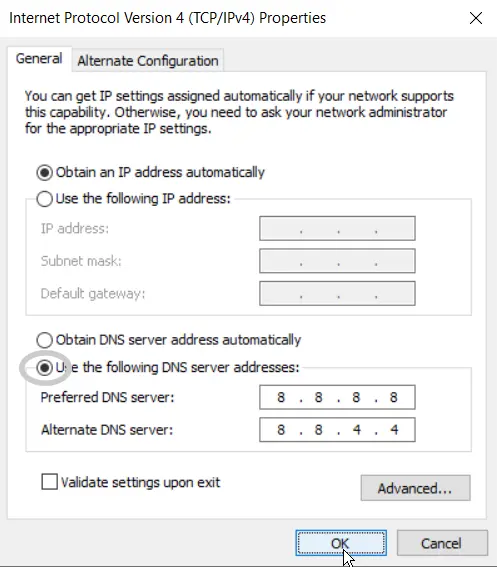
Optionally, you can add a secondary DNS Server to use if the primary DNS server is unavailable.
Change Windows DNS Setting Using CMD
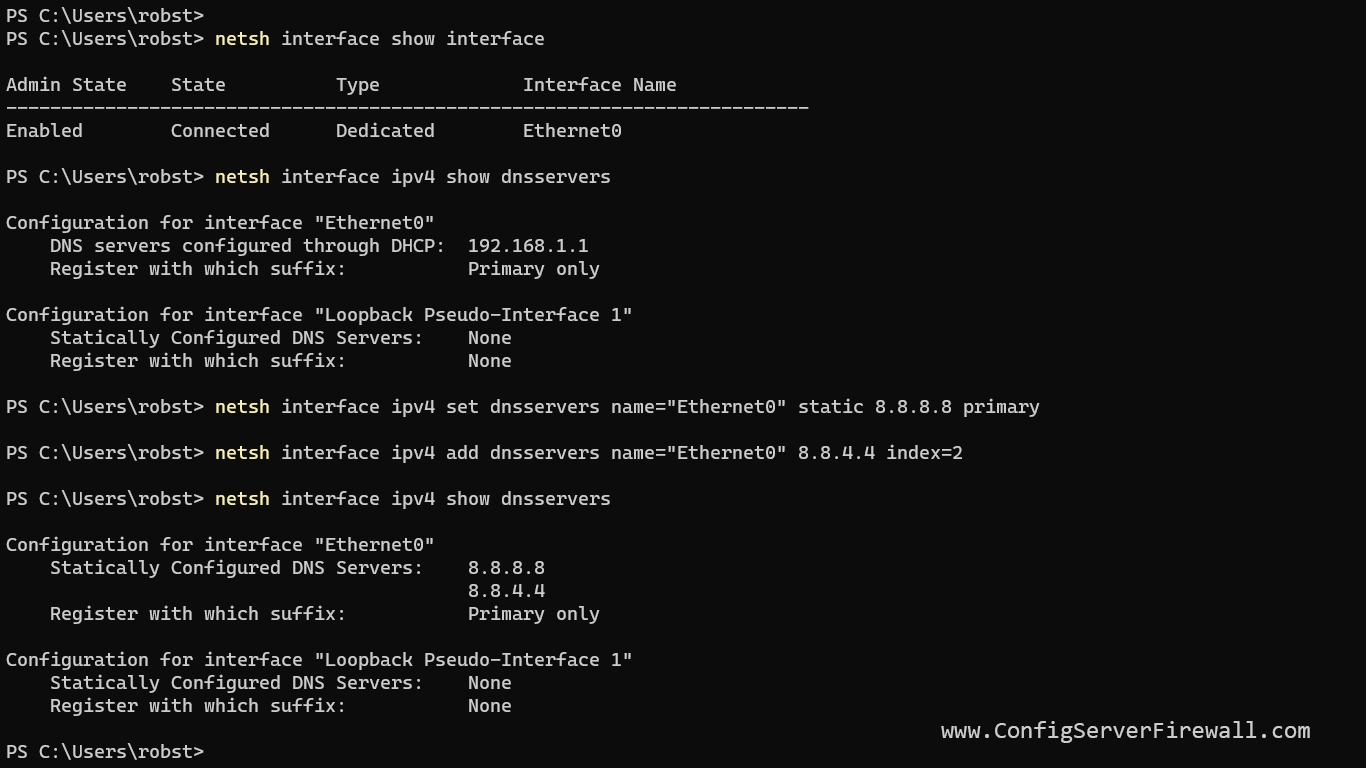
The following section describes how to change DNS settings on Windows 10/11 using the command line interface. The command we're going to use is netsh.
First of all, run the following command to identify active network interfaces on your computer:
netsh interface show interfaceRun the following two commands to see what your current DNS settings are:
netsh interface ipv4 show dnsservers
netsh interface ipv6 show dnsservers
To change the Primary DNS Server, run the netsh command as follows:
netsh interface ipv4 set dnsservers name="Ethernet0" static 8.8.8.8 primaryTo set a secondary DNS server, use the following syntax:
netsh interface ipv4 add dnsservers name="Ethernet0" 8.8.4.4 index=2In the above example, we changed DNS Servers under the interface named Ethernet0. You should change the interface name and DNS server IP address accordingly.
