Tracert: CMD Command for Traceroute in Windows
Tracert, which stands for traceroute, is a Windows CMD command used for tracing the route between your local computer and the destination.
The command shows you all the network devices, such as a router, firewall, or gateway, that network packets pass through on their way to the destination. These intermediate network devices are usually called hops.
The basic syntax for using tracert is:
tracert <IP/Domain_name>Example: Trace a Route to a Remote Server Using Tracert
The command syntax is simple, type the IP address or domain name of the remote server you want to trace route to:
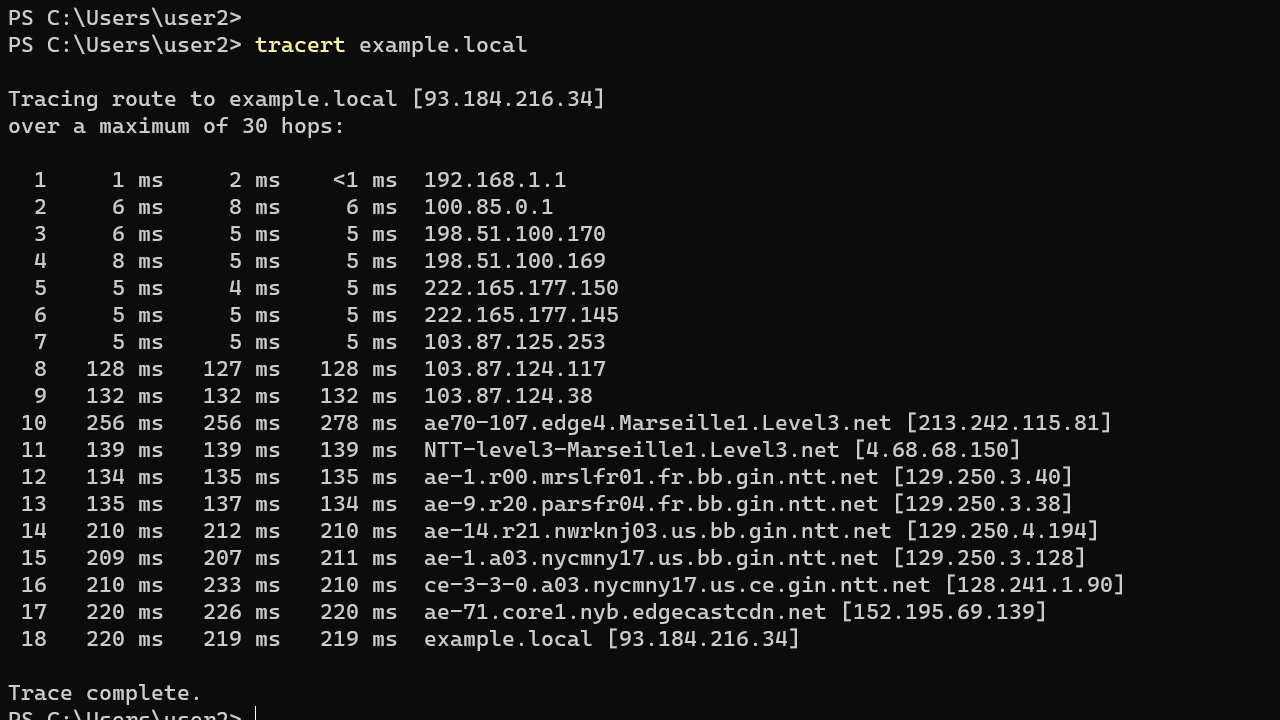
tracert example.localYou will see an output similar to the following, where tracert lists all the hops (network devices) it traverses on its way to reach the remote server.

It displays the addresses of all devices it routes through to the destination, starting with my default gateway.
Note that the output also displays the round-trip time for each hop in milliseconds. You will observe three time values because the Windows tracert command sends three packets to each hop.
This can be helpful in pinpointing the source of network slowness.
Do Not Resolve Addresses to Hostnames
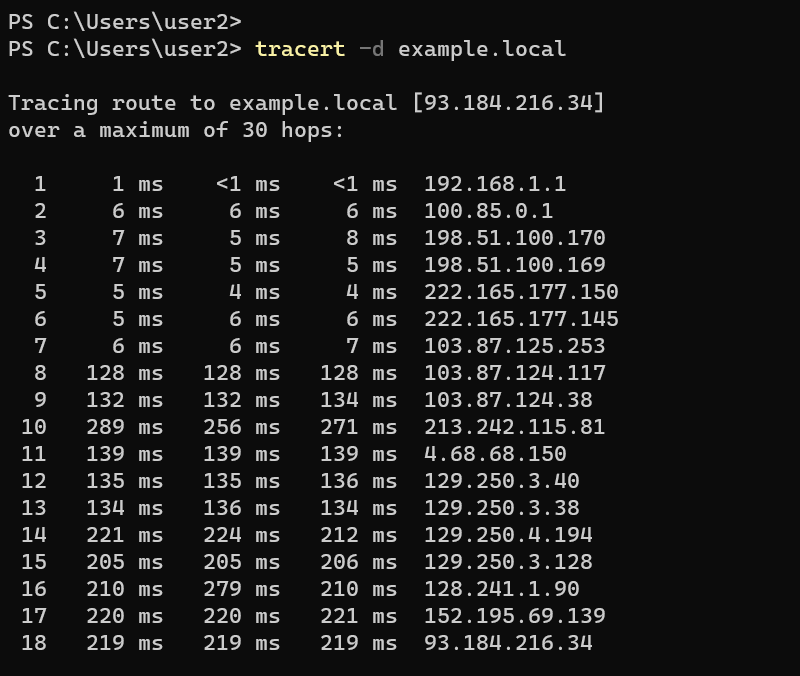
By default, tracert resolves IP addresses to domain names. However, if you're not interested in seeing hostnames, you can use the -d option.
tracert -d example.localThis time, tracert will list the IP addresses of each hop. When it doesn't have to resolve hostnames, the command also becomes much faster.

What Next?
This concludes our tutorial on the Windows Tracert Command. In the next tutorial, we will explore another command called pathping, which is similar to tracert but offers additional pieces of information that can be very useful.
By the way, the tracert command works on both CMD and PowerShell, but PowerShell offers its own version with additional features. If you're interested in learning more about PowerShell's tracert, click this link.