How to FTP Using Windows Explorer: Quick Guide
In this tutorial, I’ll show you how to access an FTP site using Windows File Explorer and how to mount an FTP server as a network location.
Whether you need to transfer files or simply browse, this method is easy and requires no additional software.
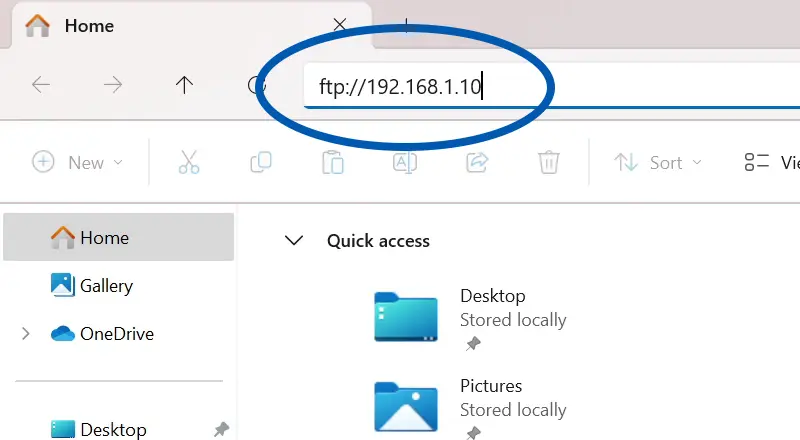
What you need to do is open File Explorer, and in the address bar, type ftp:// followed by the IP address or domain name of the FTP server. And then press Enter.
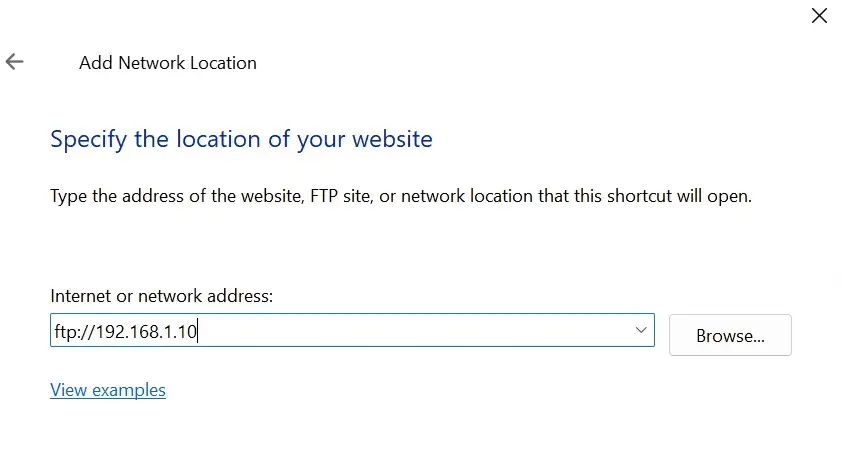
For example: ftp://ftp.example.com or ftp://192.168.1.10.
If the FTP server requires authentication, you’ll see a prompt to Enter username and password.
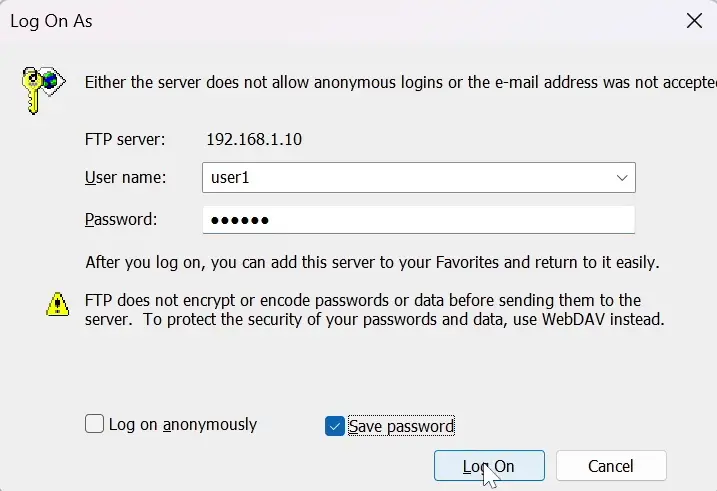
Now you can use Windows Explorer as an FTP client to transfer files between the server and your computer.
How to Mount an FTP Server as a Network Location
For quick and easy access, you can mount an FTP server as a network location in Windows File Explorer.
To do that Open File Explorer and go to This PC. Then, if you're on Windows 11, click the three-dot menu and select Add a network location.
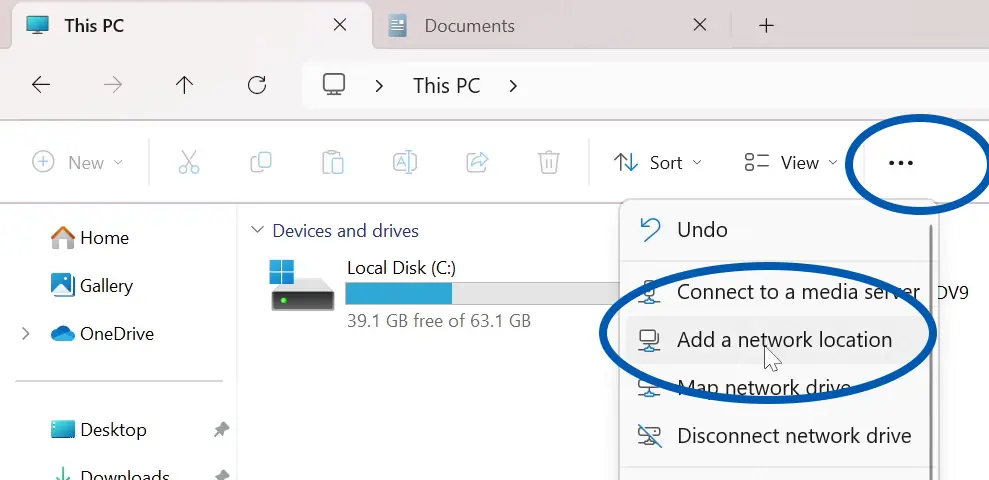
On Windows 10, you'll find this option under the 'Computer' tab.
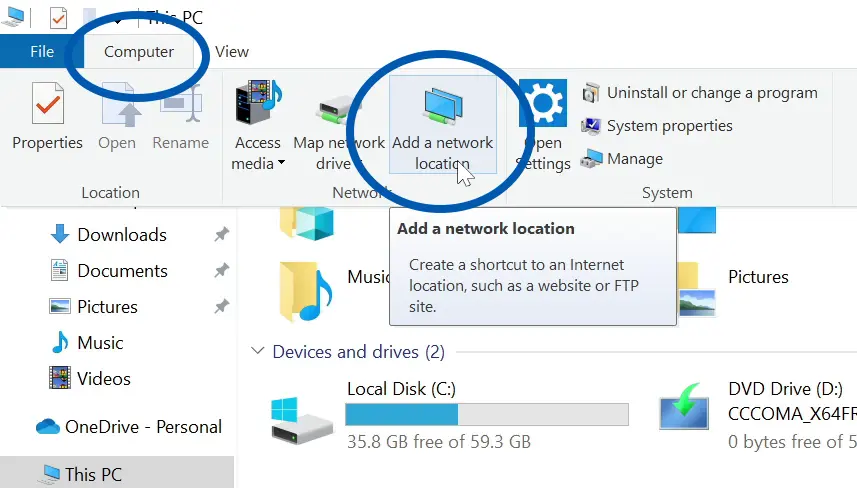
In the Network Location Wizard, select 'Choose a custom network location' and enter the FTP server's address.
If the server requires authentication, uncheck the 'Anonymous' option and enter your username.
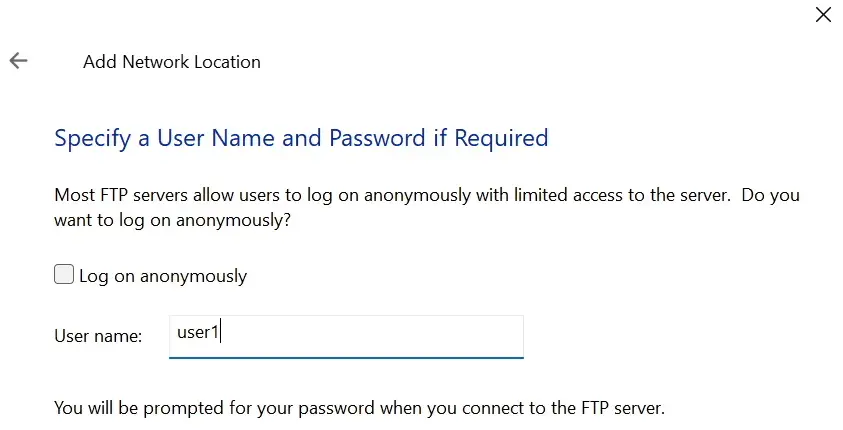
Once you finish the wizard, it will prompt you for your password, unless you've already saved your credentials.
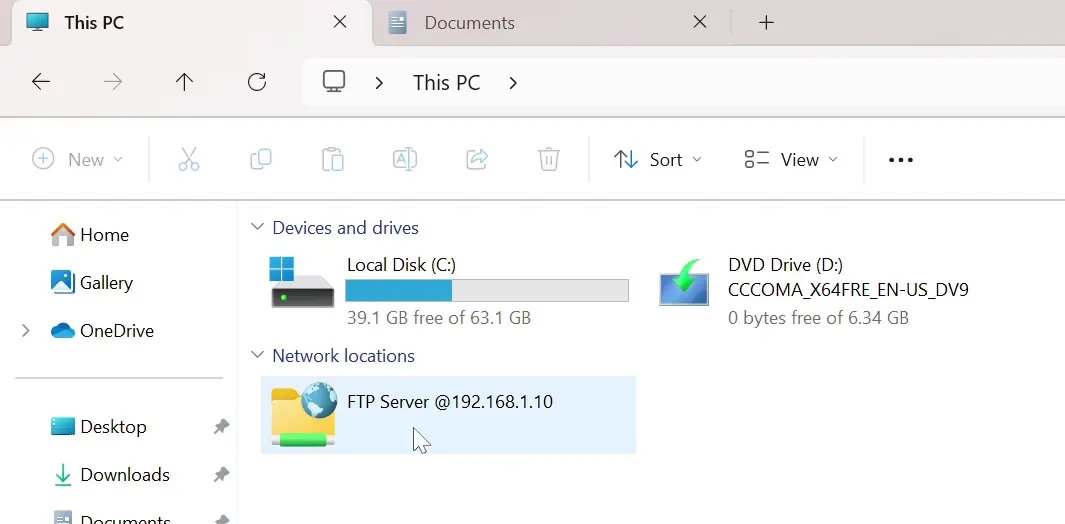
Once you're done, the FTP server will appear in File Explorer under 'This PC.
And that’s the end of this quick guide on how to use Windows Explorer as an FTP client . For more Windows tips like this, subscribe to our YouTube channel @RealClearComputing.
