How to Change Computer Name in Windows 10/11
In this tutorial, you will learn how to change the computer name in Windows 10/11. We can rename Windows using the GUI, CMD, or PowerShell. We are going to look at all three methods.
You can use the following techniques to change the computer name on Windows 10, 11, and Windows Server.
Rename Windows Using the GUI
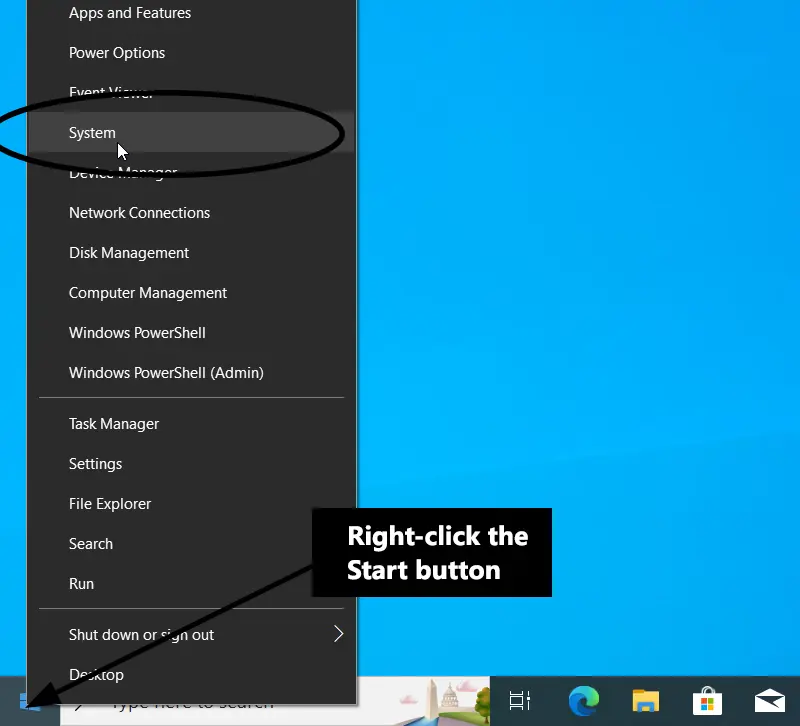
On your computer, right-click the Start button and choose System from the menu that appears.

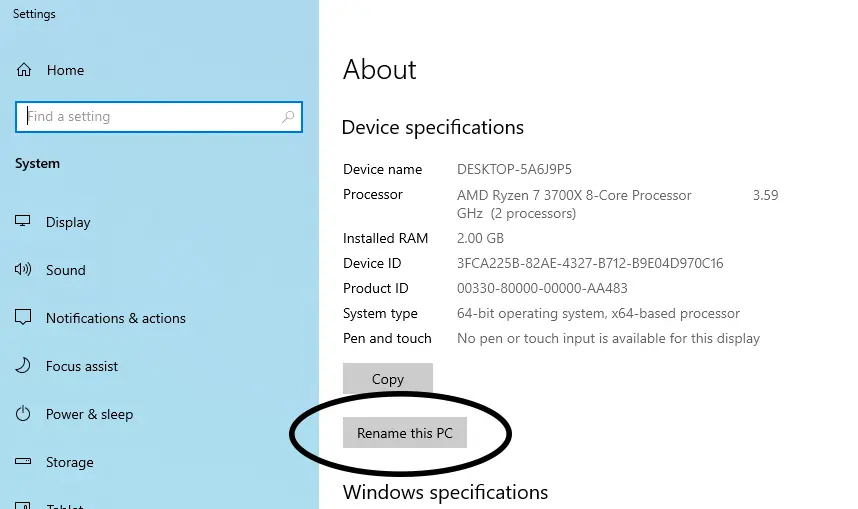
The About window appears. On Windows 10, you will see the Rename this PC button after the Device specifications section, as shown in the following screenshot.

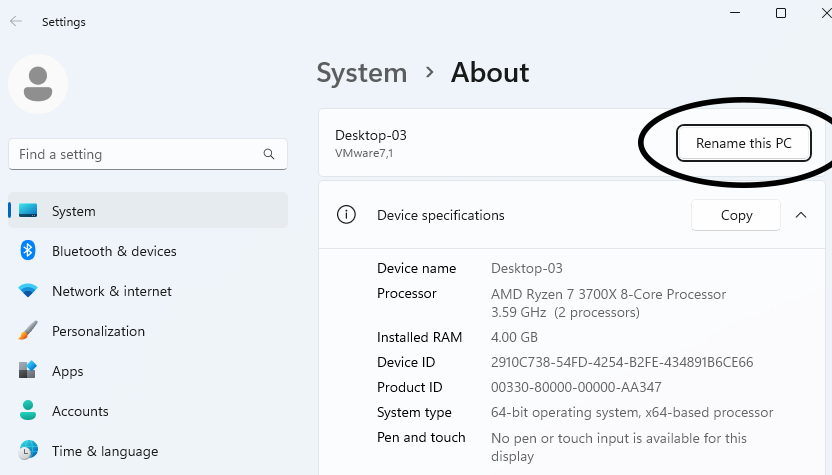
On Windows 11, you will see the Rename this PC button as the first thing in the About window.

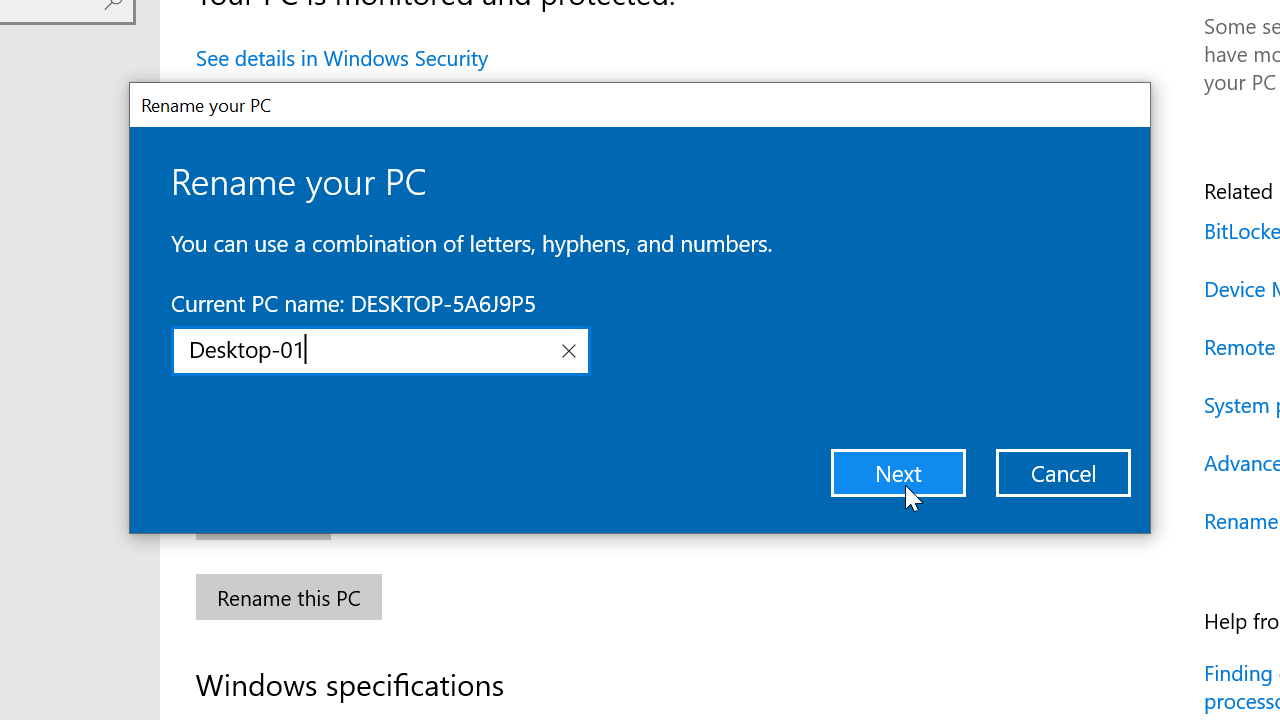
To change the computer name, click the Rename this PC button and type the new name in the text box that appears.

You will need to restart the computer before this change takes effect.
Using Windows PowerShell
On Windows PowerShell, use the Rename-Computer cmdlet to rename Windows. The command syntax is as follows:
Rename-Computer -NewName "ComputerName" -RestartFor example, to change the name of my Windows 10 PC to Desktop-01, I will run the following command:
Rename-Computer -NewName "Desktop-01" -RestartPowerShell will restart your PC immediately after executing the command. If you don't want to restart the computer, run the Rename-Computer cmdlet without the -rename option.
Rename-Computer -NewName "Desktop-01"On PowerShell, you can check the name of the computer by running the following command:
Get-ComputerInfo -Property "CsName"
Using the Command Prompt (CMD)
In the CMD, we use the wmic command to rename Windows. The command syntax is as follows:
wmic computerSystem where name="%COMPUTERNAME%" call rename name="NewName"This command changes the computer name to Desktop-01:
wmic computerSystem where name="%COMPUTERNAME%" call rename name="Desktop-01"On Windows CMD, you can check the computer name by running the hostname command.