How to Install VirtualBox Guest Additions on Ubuntu 24
In this article I will show you the correct way to install VirtualBox Guest Additions on a Ubuntu 24 Virtual machine.
Following are the steps you need to follow:
- Install dependencies (build-essential, DKMS, and Linux headers)
- Insert and mount the Guest Additions CD image
- Run the Guest Additions Linux installer
Install dependencies (build-essential, DKMS, and Linux headers)
First, install the following dependency package required for Guest Additions installation:
sudo apt update
sudo apt install build-essential dkms linux-headers-$(uname-r)
Insert and mount the Guest Additions CD image
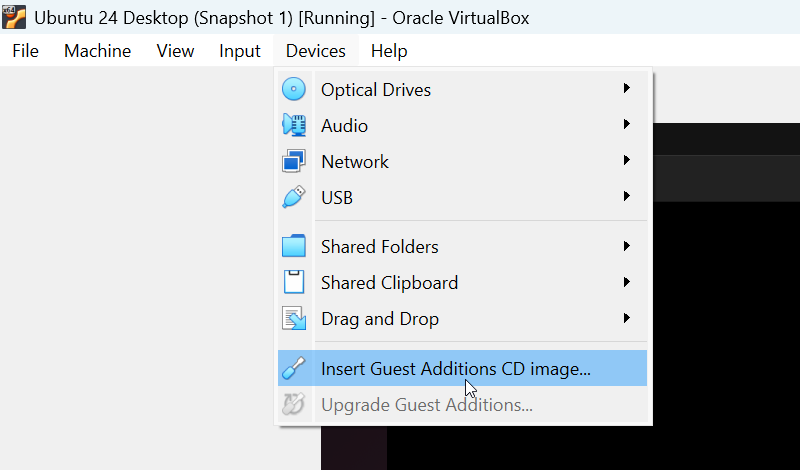
After that, go to the Devices menu and click on the "Insert Guest Additions CD Image" option.
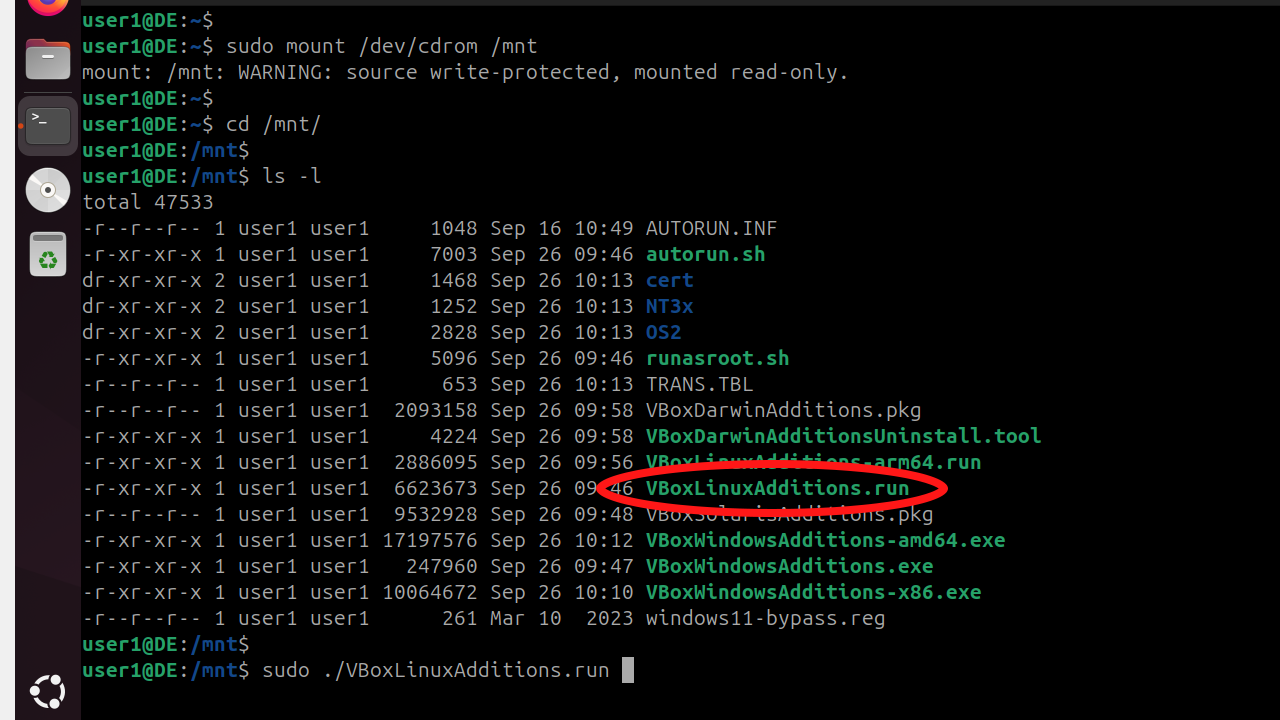
After inserting the CD image, mount it to the /mnt directory using the following command:
sudo mount /dev/cdrom /mntRun the Guest Additions Linux installer
Now install the guest additions, first cd into /mnt directory and then run the VBoxLinuxAdditions.run file.
cd /mnt/
sudo ./VBoxLinuxAdditions.run
Once the installation is complete, restart the virtual machine. That’s it!
If you follow the above steps, Guest Additions will install without errors like This system is currently not set up to build kernel modules or The headers for the currently running kernel were not found.
VirtualBox Guest Additions will significantly improve the performance of your Ubuntu virtual machine and enable useful features such as:
- Mouse Pointer Integration – Allows you to move the mouse pointer seamlessly between the host computer and the Ubuntu virtual machine.
- Folder Sharing – Enables sharing of folders between the host and the virtual machine.
- Shared Clipboard – Allows clipboard sharing between the host and the virtual machine.
- Seamless Mode – Lets you run the virtual machine in seamless mode, integrating it with the host desktop.
Additionally, Ubuntu VirtualBox Guest Additions will automatically adjust the screen resolution of your Ubuntu desktop.