How to Install TightVNC Server on Ubuntu
In this tutorial, you will learn how to install VNC on Ubuntu to access the graphical desktop from a remote computer.
VNC (Virtual Network Computing) is a cross-platform remote control utility that uses the Remote Frame Buffer (RFB) protocol, is a way to share a graphical desktop over the network, similar to Remote Desktop on Microsoft Windows.
For specific information on Ubuntu Server 24, click on this link.
To Install and Configure VNC Server on Ubuntu 24.04, perform the following steps:
- Open the terminal and use the following commands to install the Xfce desktop session:
We will use the Xfce desktop for the VNC session (which works perfectly with Ubuntu Server).sudo apt-get update sudo apt-get install xfce4 lightdm-gtk-greeter dbus-x11 - Once Xfce is installed, install the tightvncserver package on Ubuntu:
sudo apt-get install tightvncserver - When the installation completes, start the VNC server for the first time (IMPORTANT: you must start the VNC server using the user account you will use to sign in to VNC, not from the root account. So do not run the following command as the root user):
When you run the vncserver command for the first time, you will be prompted to create a password for the VNC connection. It will also create the necessary configuration files required for the VNC server.vncserver - Next, we need to edit the startup configuration file. First, stop the VNC Server with the
killcommand:vncserver -kill :1 - Open the
~/.vnc/xstartupfile:
And make sure that the xstartup file is similar to the following configuration:vim ~/.vnc/xstartup#!/bin/sh unset SESSION_MANAGER [ -x /etc/vnc/xstartup ] && exec /etc/vnc/xstartup [ -r $HOME/.Xresources ] && xrdb $HOME/.Xresources startxfce4 & - Save the configuration file and start the VNC Server:
The remote session will use the 1366x768 resolution, and the desktop ID is 1.vncserver :1 -geometry 1366x768
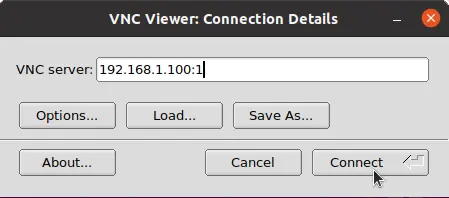
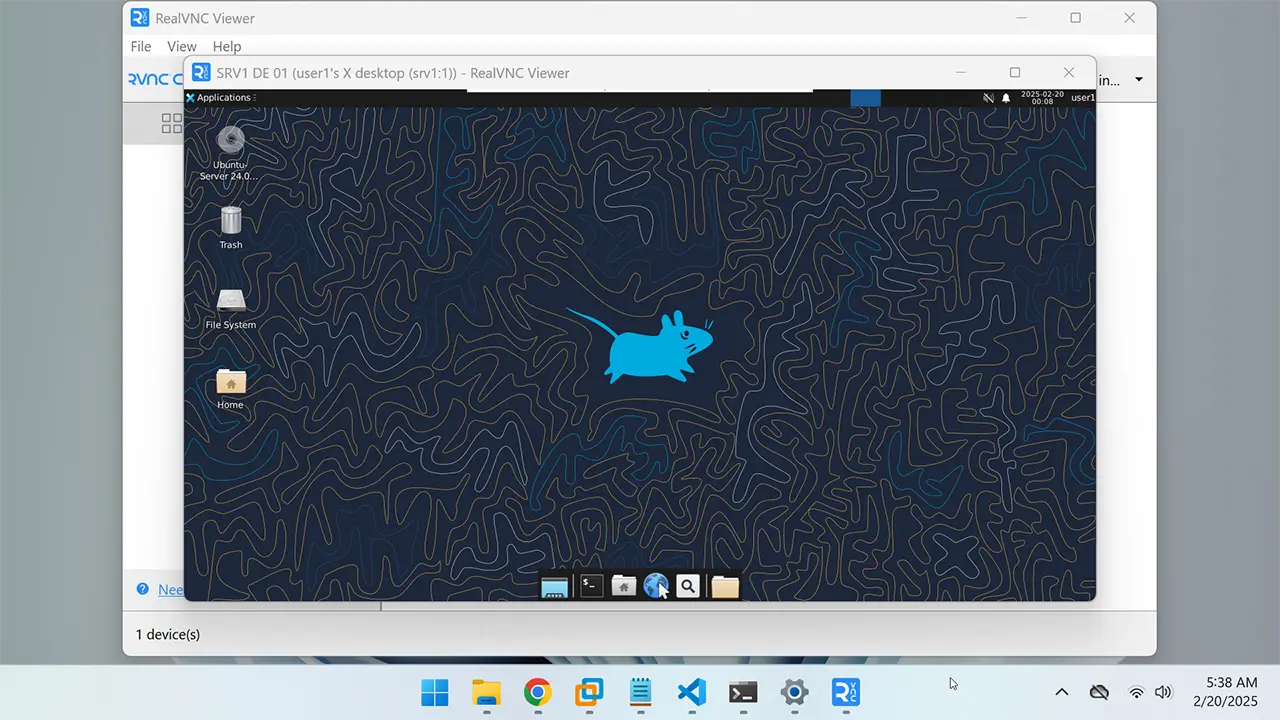
The user needs a VNC Viewer to connect to Ubuntu from their local computer. Ubuntu users can use the tigervnc-viewer or Vinagre remote desktop viewer. For Microsoft Windows, you can use the RealVNC Viewer.

Enter your Ubuntu server IP address and the VNC desktop number to be connected.

Multiple users can connect to the Ubuntu system and work simultaneously
Click on this link for detailed instructions on how to allow multiple users with TightVNC Server.
Automatically Start the VNC Server on Startup
Click on this link for detailed instructions on how to start the VNC Server automatically on Ubuntu.
Summary
In this tutorial, we learned how to install VNC on Ubuntu. VNC is a cross-platform Remote Desktop Server implementation that uses the Remote Frame Buffer (RFB) protocol.
The way it works, The VNC Server runs on your Ubuntu Server/Desktop, and the VNC client application runs on the computer from which you want to access the remote desktop.