Docker Desktop for Windows 11 & 10: Complete Installation Guide
In this tutorial, we will learn how to install Docker on Windows 10 and 11. We will also learn how to start containers and switch between Linux containers and Windows containers.
By the end of this tutorial, you'll have Docker installed and be ready to start running containerized applications on your Windows computer.
Note that this guide is for Windows 10 and Windows 11. If you want to install Docker on Windows Server, there is a separate tutorial (click the link below).
How to Install Docker on Windows Server 2022Before We Begin
Before setting up Docker on Windows 11, there are a few things to consider.
- Docker Desktop is the official way to run Docker on Windows 11.
- It leverages WSL 2, a Microsoft technology that lets you run Linux environments directly on Windows.
- WSL 2 relies on a lightweight Hyper-V virtual machine, which can conflict with third-party hypervisors like VirtualBox or VMware Workstation.
- So, if you rely on these tools for development or testing, installing Docker Desktop might cause issues.
- An alternative solution is to run Docker on a Linux virtual machine within VirtualBox or VMware Workstation instead of installing Docker Desktop.
System Requirements
To install Docker Desktop, virtualization needs to be enabled. You can click the link below to learn how to check and enable virtualization on your computer.
How to Enable Virtualization on Windows 10 and 11Docker Installation Guide (Full Walkthrough)
To install Docker Desktop on your computer, complete the following steps:
Check If WSL 2 Has Been Enabled
Our first step is to check if WSL 2 is enabled. To do that, run the following command in CMD or PowerShell:
wsl --statusIf WSL 2 is installed you will see and output like following:

If you don't see any output that means WSL 2 is not installed. In that case you can install WSL 2 by running the wsl --install command.
wsl --installBefore running the command, make sure to open the Command Prompt or PowerShell console as an administrator.
You will need to restart your computer during the process. Once your computer has rebooted, it will install the Ubuntu distribution. This is part of the WSL 2 installation and is unrelated to Docker.
You can read the full WSL 2 installation guide at the bellow link.
How to Install WSL 2 on WindowsDownload the Docker Installer for Windows
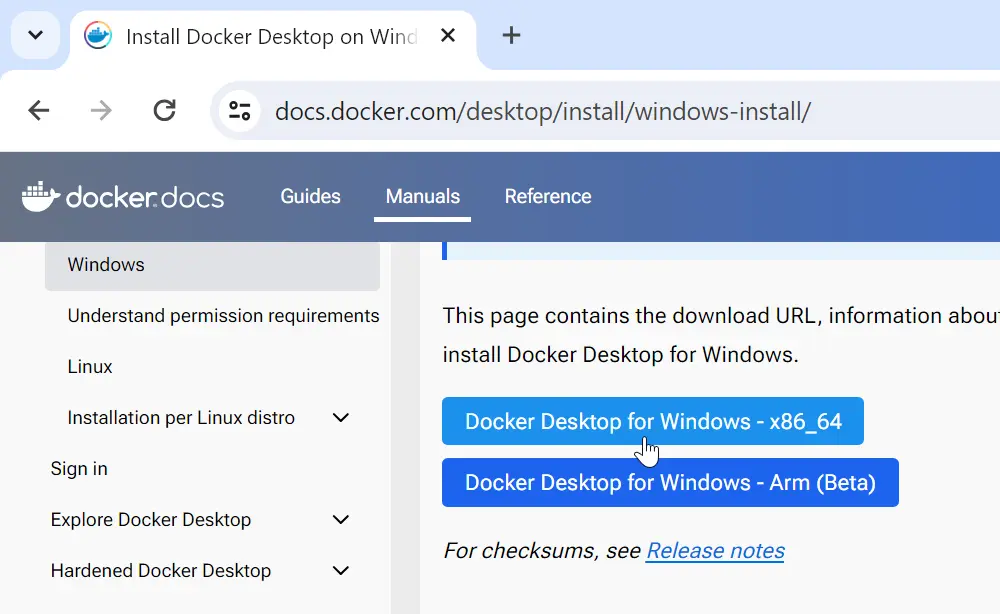
Ok, the next step is to download the docker desktop installer for Windows 11. To do that click on this link and then download the 86_64 installer at the top of the page.
Run the Installer
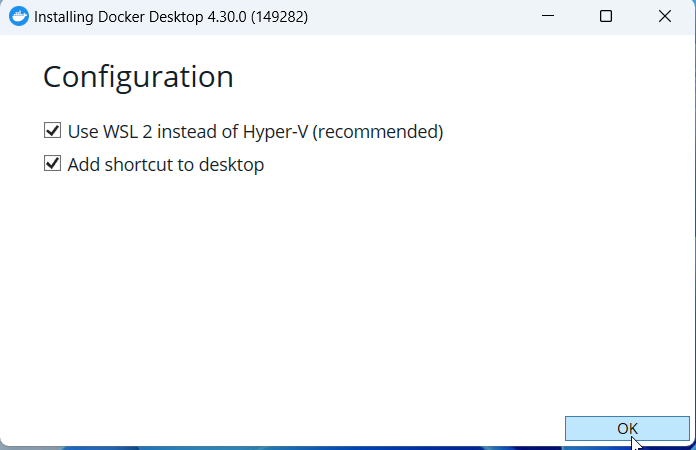
After the download is complete, run the installer. Continue with the recommended configuration and ensure the WSL 2 option is checked.
Once the installation is finished, you will be prompted to restart your computer. After that, it will start the Docker engine for the first time and present you with the Docker Desktop dashboard.
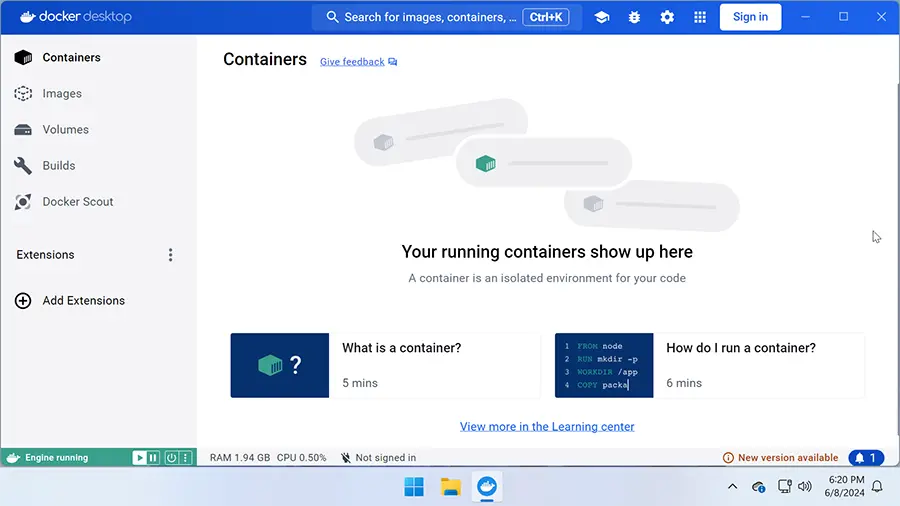
The Docker Desktop dashboard lets you manage containers visually. However, you also have the flexibility to use the Docker command through Command Prompt or PowerShell for more granular control.
How to Check Docker VersionRunning Docker Containers on Windows
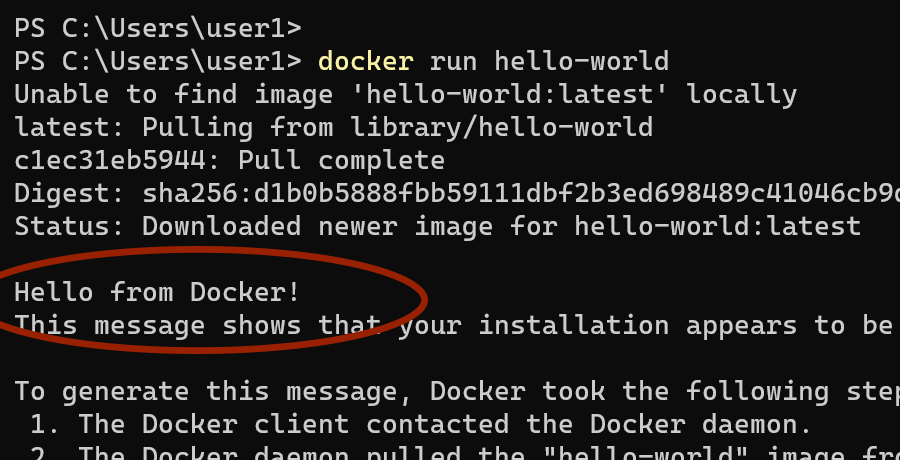
To make sure everything is working properly, we will start a test container using the hello-world image.
Open a command prompt and run the following command:
docker run hello-worldA successful setup will display the "Hello from Docker!" message, confirming that your Docker environment is ready to go.
To learn more about the docker run command and how to create containers, click the link below.
Linux Containers vs. Windows Containers
So here's the thing: Docker on Windows allows you to run two types of containers—Linux containers and Windows containers.
Most containers are based on Linux, but if you need to run a Windows operating system, like Windows Server, you'll need to use Windows container mode.
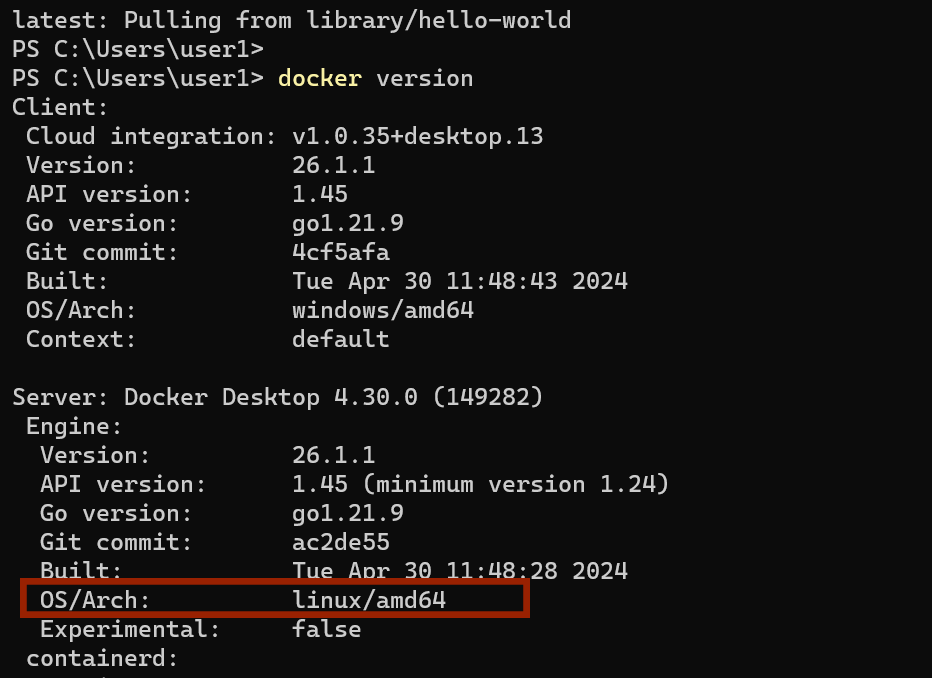
By default, Docker Desktop runs in Linux container mode. You can verify this by running the docker version command, which will show "Linux" as the server architecture.
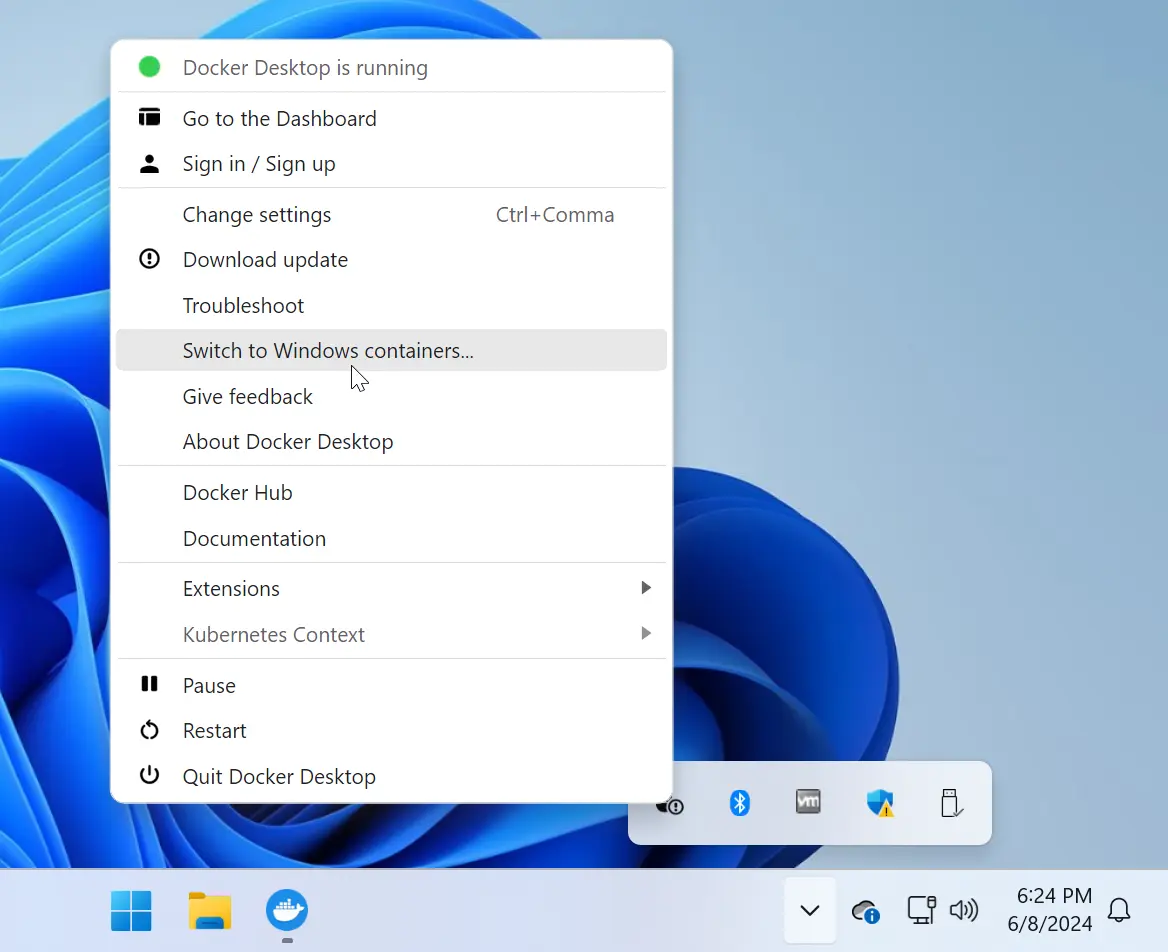
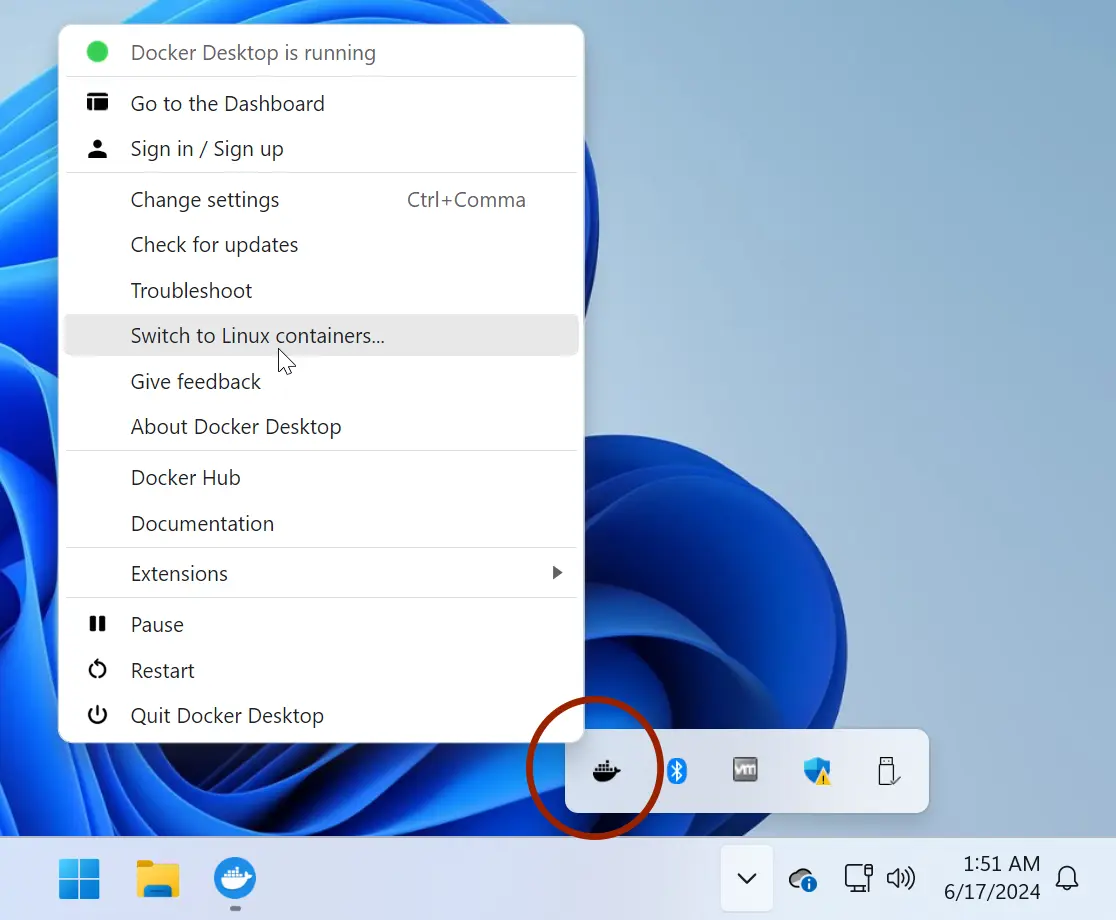
To switch to Windows mode, right-click the Docker icon in the system tray and select "Switch to Windows containers…".
When you first switch to Windows containers, Docker Desktop will check if the Windows containers feature is enabled on your system. If not, it will prompt you to enable it before proceeding.
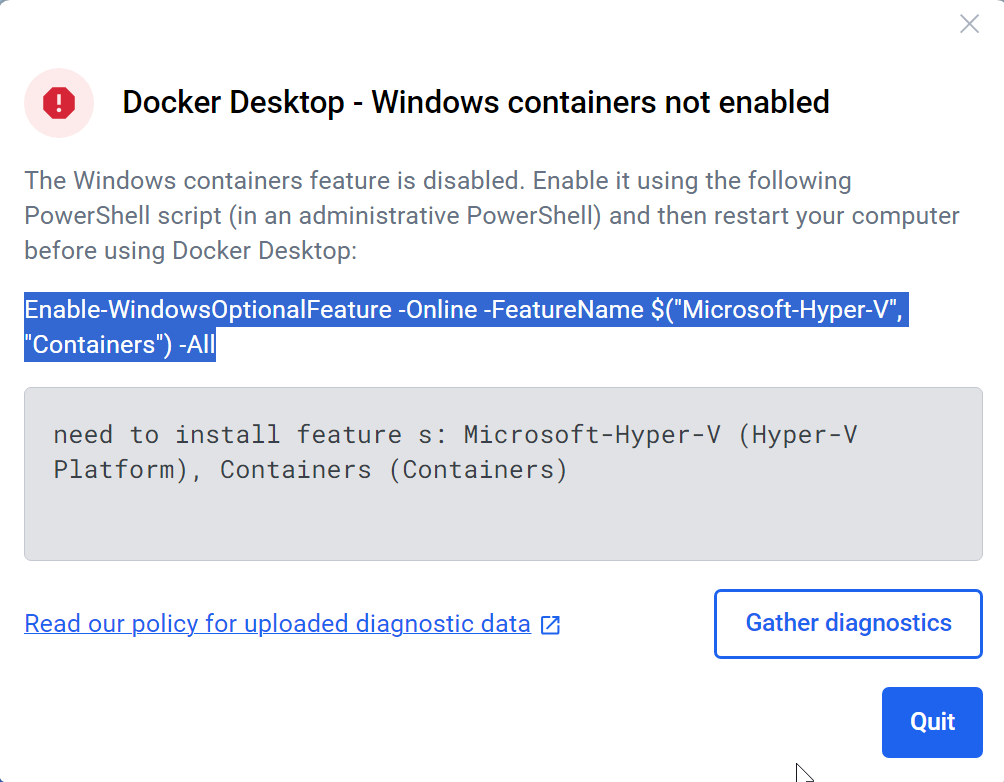
Copy the provided command and run it in a PowerShell console to enable the containers feature.
Enable-WindowsOptionalFeature -Online -FeatureName $("Microsoft-Hyper-V", "Containers") -AllAfter enabling Windows containers, you'll need to restart your computer for the changes to take effect. Once restarted, launch Docker Desktop from the desktop icon or Start menu shortcut. Wait for the Docker engine to fully initialize, then open a command prompt and run the docker version command.
docker versionThis time, the server architecture should be Windows if you have switched to Windows containers mode.
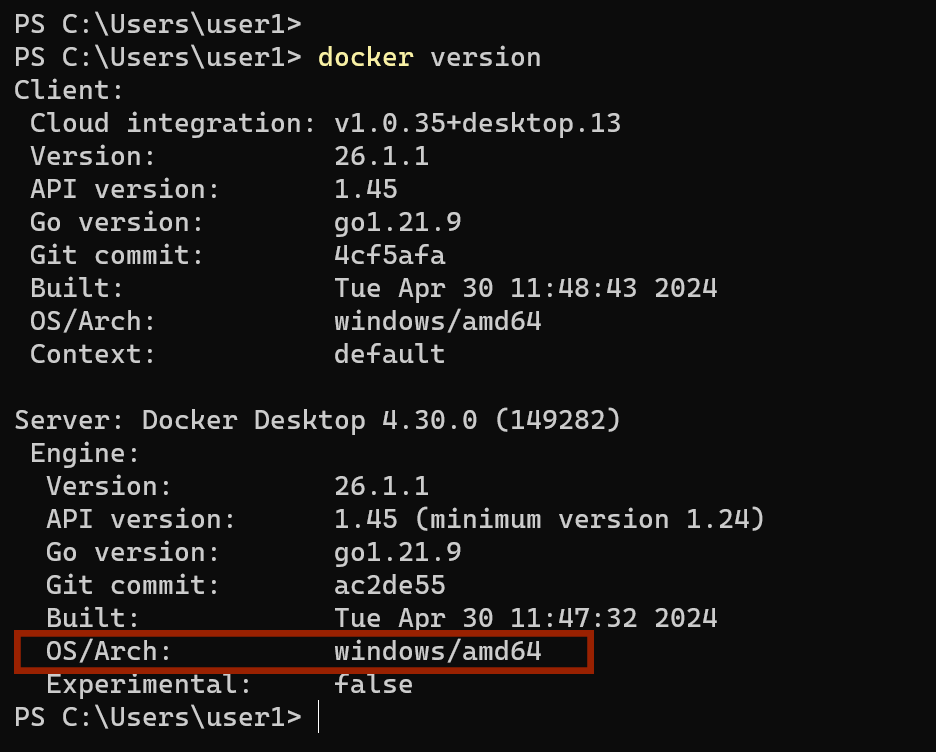
To test Windows mode working properly, start a hello world container by running the following command:
docker run hello-worldA successful setup will display the "Hello from Docker!" message in your terminal, confirming that Windows container mode is functioning correctly.
Switching to Linux containers
While in Windows container mode, you cannot run applications built for Linux. To switch back to Linux containers and run Linux-based applications, right-click the Docker icon in the system tray and select "Switch to Linux containers…".
What Next?
Alright, that brings us to the end of this tutorial on setting up Docker Desktop on Windows 11! Now that you have Docker up and running, head over to our next tutorial to learn how to create containers using the docker run command.