Docker WordPress: How to Install WordPress on Docker Containers
In this docker tutorial we are going to learn how to install WordPress on Docker.
To run wordpress we need two docker containers. One for the MySQL Server instance and other one is for the wordpress instance with a link to the mysql container.
For the Database Server you can use either MySQL or MariaDB container.
Start a new MySQL container for WordPress
First download the latest version of the mysql image:
docker pull mysql:latestThen start a new container with a new mysql database.
docker run -d --name mysql_wordpress -e MYSQL_ROOT_PASSWORD=123456 -e MYSQL_DATABASE=wordpress -e MYSQL_USER=wp_user -e MYSQL_PASSWORD=wp_pass mysql:latestAs per the above command, we started a new mysql instance called "mysql_wordpress". On the startup we also created a new mysql user and a database called "wordpress" to use with our WordPress website.
To access the mysql container type:
docker exec -it mysql_wordpress bashStart the WordPress Docker Container
Download the latest version of the wordpress docker image:
docker pull wordpress:latestNow start the wordpress container with a link to the mysql server instance. Also open host port 80 and map to the port 80 on the wordpress container.
docker run -d -p 80:80 --name wordpress --link mysql_wordpress:mysql wordpress:latestTo get an interactive shell session to the wordpress docker container, Type:
docker exec -it wordpress bashBefore installing wordpress, make sure that both containers are running:
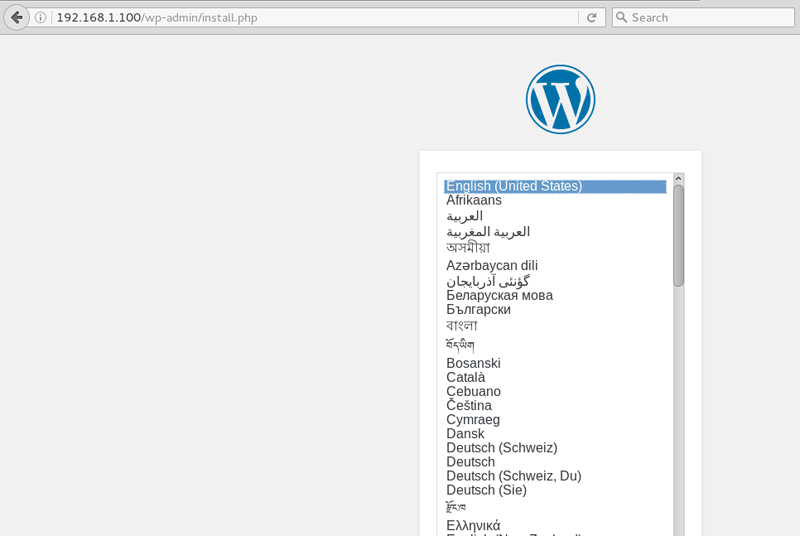
docker psNow, with both containers up and running, Open the Web browser and type the IP address of your host computer.
you should see the WordPress installation page as shown in the above screenshot.
Default DocumentRoot and Virtual Host File
Inside the wordpress docker container, the "/var/www/html" directory is the DocumentRoot of your wordpress website.
- The /etc/apache2/sites-available/000-default.conf file is the default VirtualHost file.
- To configure domain name, add ServerName and ServerAlias directive to the virtual host file.
ServerName www.example.com
ServerAlias example.com
The docker wordpress container by default have not text editor. For file editing you will need to install either vim or nano text editor.
apt-get update
apt-get install vim