How to Install OBS (Open Broadcaster Software) on Ubuntu 24
To install the latest version of OBS for Ubuntu, first set up the OBS Studio PPA repository and then install using the apt install command.
To set up the OBS PPA repository, run the following two commands:
sudo add-apt-repository ppa:obsproject/obs-studio
sudo apt update
Then install OBS using the following command:
sudo apt install obs-studioIf you wish to uninstall OBS from Ubuntu, run these sets of commands:
sudo apt purge obs-studio
sudo apt autoremove
rm -rf ~/.config/obs-studio
That concludes the installation process for Open Broadcaster Software on Ubuntu. Next, we will proceed with configuring OBS for screen recording.
Setting Up OBS Studio for Screen Recording on Ubuntu
When you start OBS for the first time, the auto-configuration wizard will run to determine the best settings for your desktop.
In the auto-configuration wizard, choose the best option that suits your primary use, whether it's mostly streaming or recording. You can change these settings later if needed.
Let's Add Your Video and Audio Sources
Before starting to record your screen, you need to add video and audio (optional) sources to record.
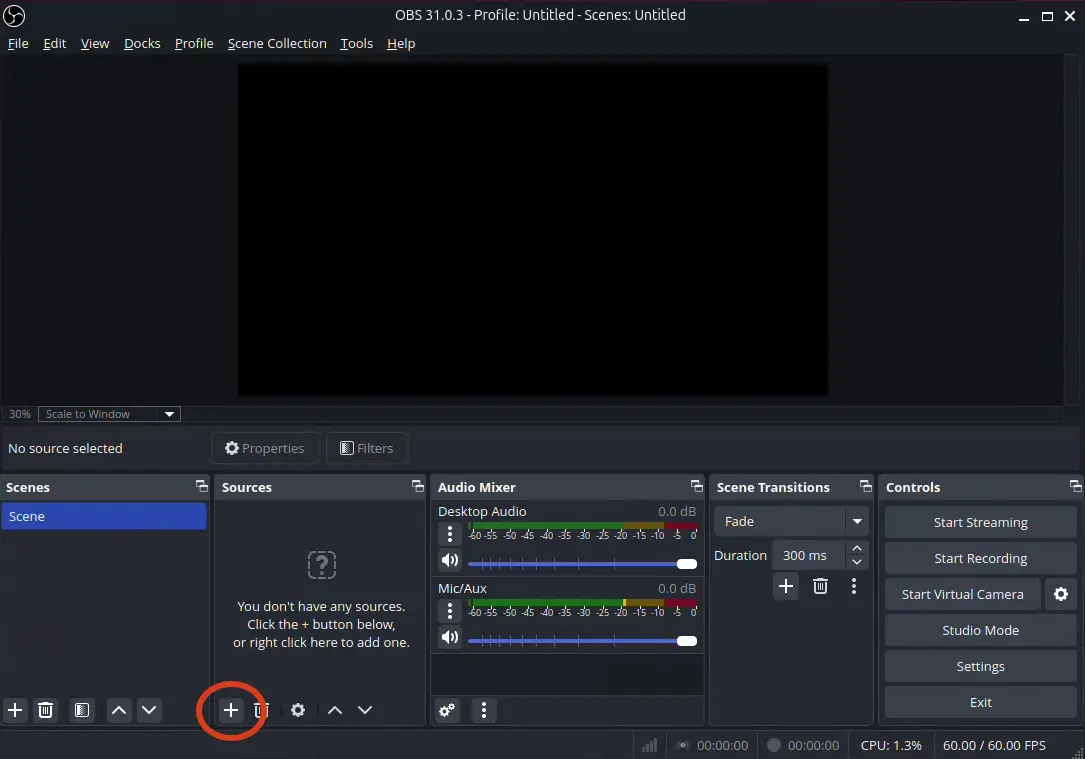
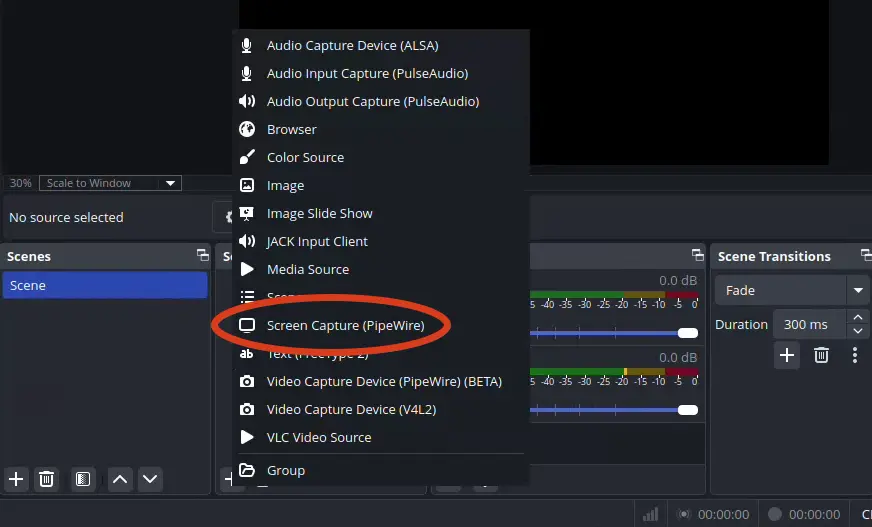
To do that click the plus button (+) in the Sources Windows and choose Screen Capture (PipeWire).
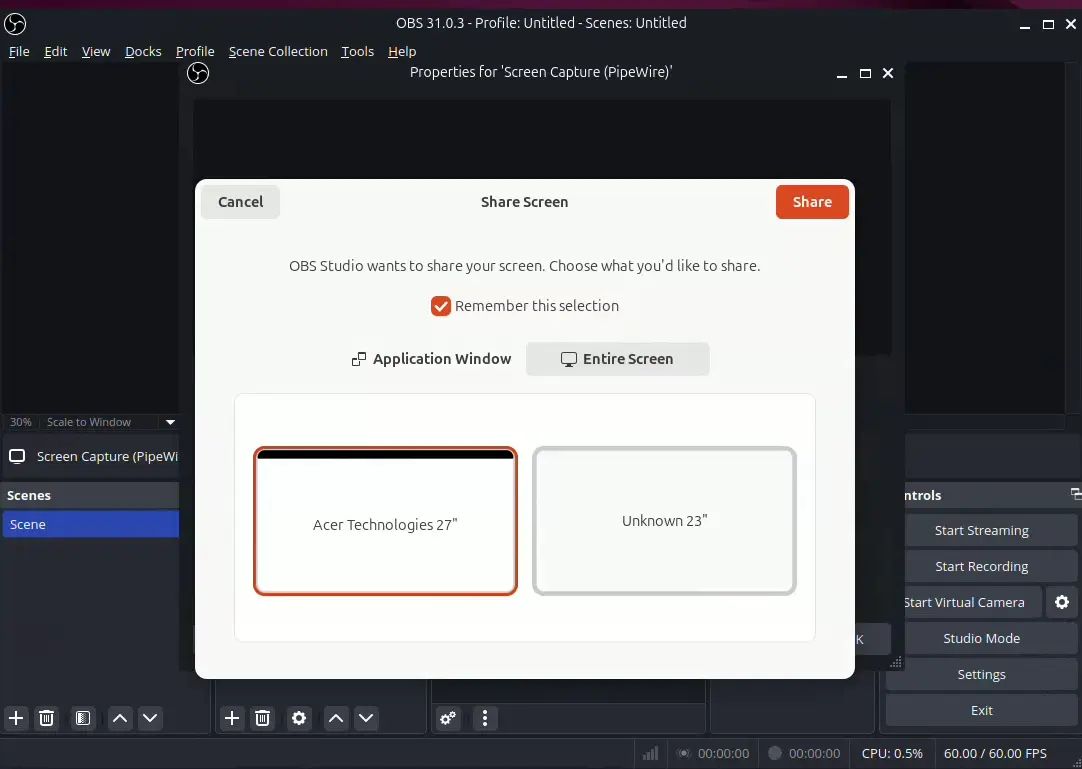
In the "Share Screen" window that appears, choose "Entire Screen," then select your display, and click "Share."
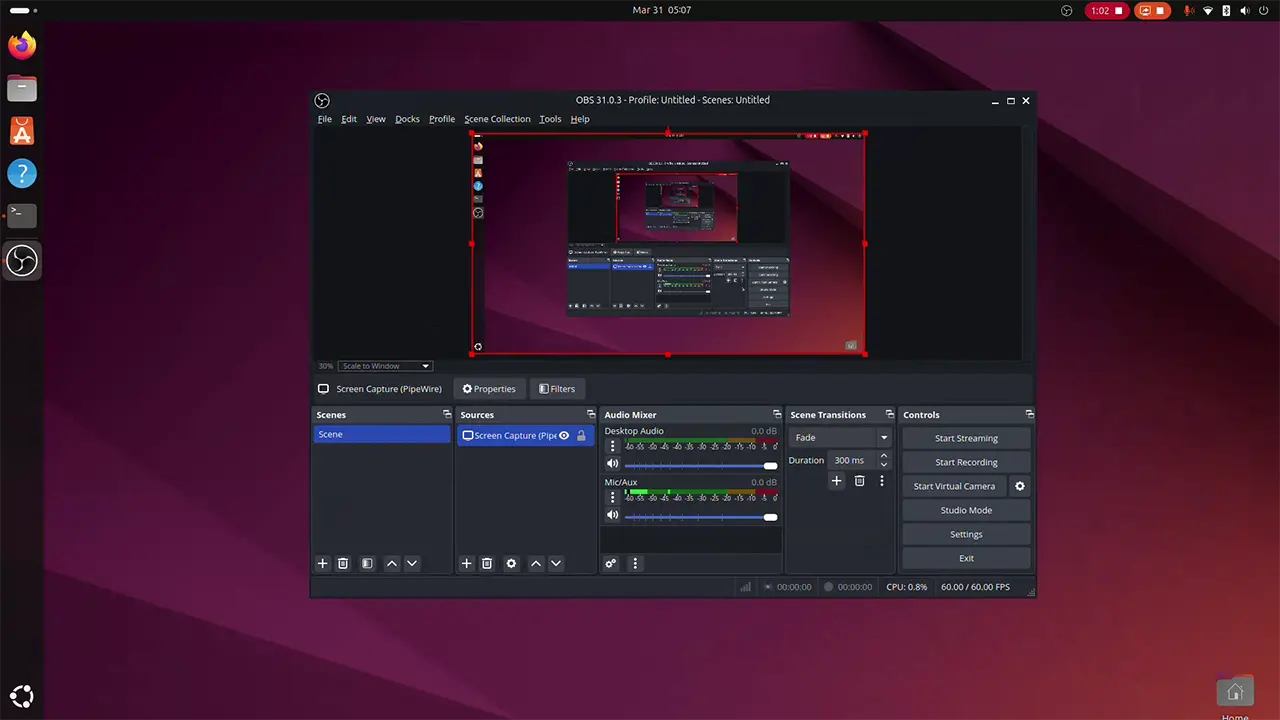
After doing that, you will see your desktop displayed in the main OBS Studio window. This indicates that OBS is now ready to record your screen.
If you also wish to record your microphone, click the "+" button again in the Sources window and choose "Audio Input Capture (PulseAudio)."
Then, from the available options, select the audio input device you wish to use (e.g., your microphone).
Let's Check Your Video and Output Settings Before Recording
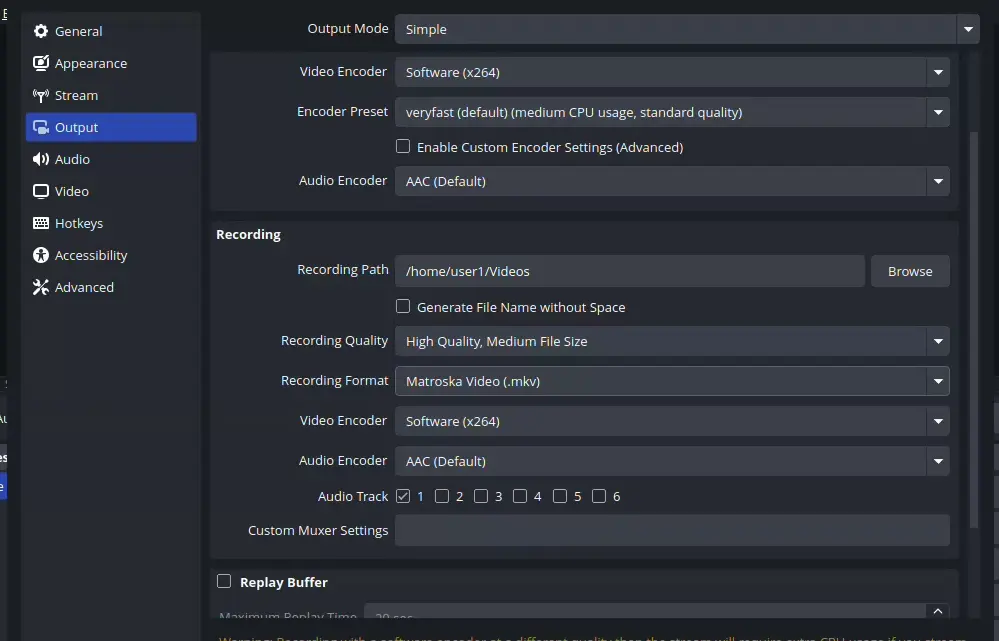
To change OBS settings, go to the File menu and then choose Settings. In the Settings window, first go to the Output section and set the Recording Path, Quality, and the desired output format.
For Recording Quality, we recommend selecting "High Quality, Medium File". For the Recording Format, MKV is generally recommended.
The advantage of using MKV over MP4 is that if anything crashes during recording, your video will likely be saved up to the point of the crash. With MP4, the file will probably be corrupted.
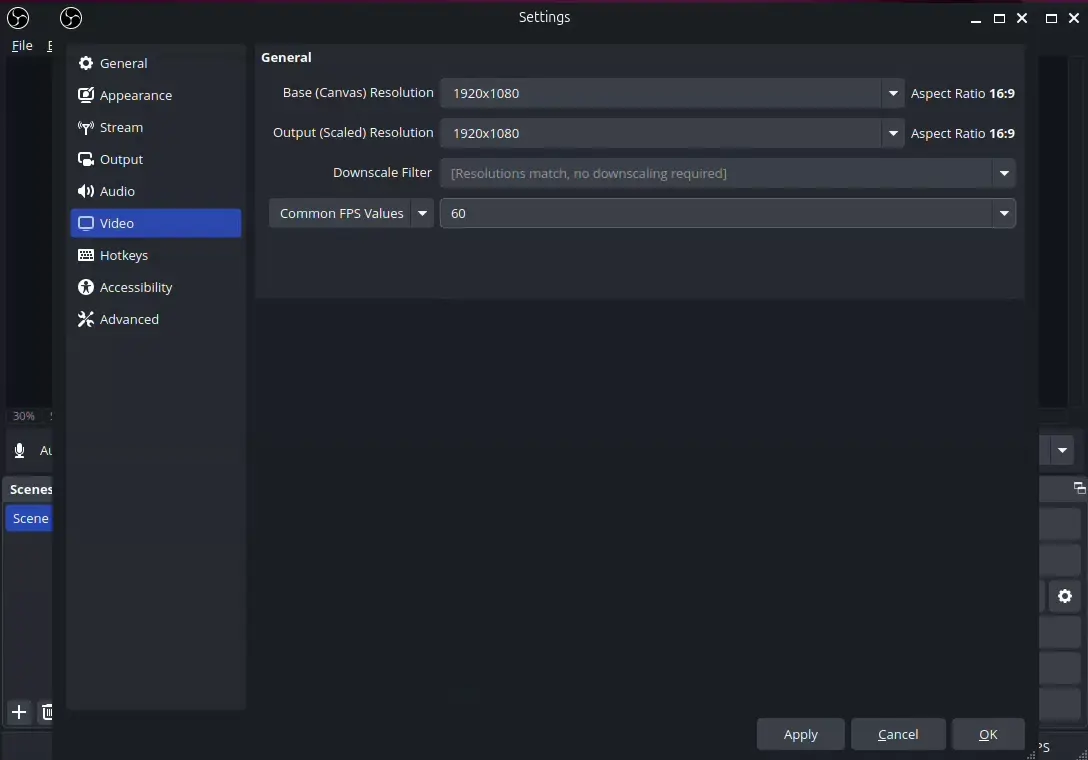
Next, navigate to the Video settings and configure the Output (Scaled) Resolution and FPS (frames per second) values for your video output.
The Output (Scaled) Resolution determines the resolution of your final recorded video. Common examples include 4K (2160p), 1080p, and 720p.
For FPS (frames per second), a good starting point is 60 FPS.
Now You Can Start Recording Your Ubuntu Desktop
This concludes the basic setup of Open Broadcaster Software for Ubuntu. You can now initiate recording your desktop by clicking the "Start Recording" button located in the bottom-right corner.