How to Set Static IP Addresses in Ubuntu 24 Server (Netplan Tutorial)
In this tutorial, you'll learn how to configure static IP addresses on your Ubuntu Server 24 system using the Netplan configuration file. I will show you how to locate Netplan configuration files, set default gateways, DNS name servers, and configure wireless interfaces.
In This Page
Identify the Network Interface
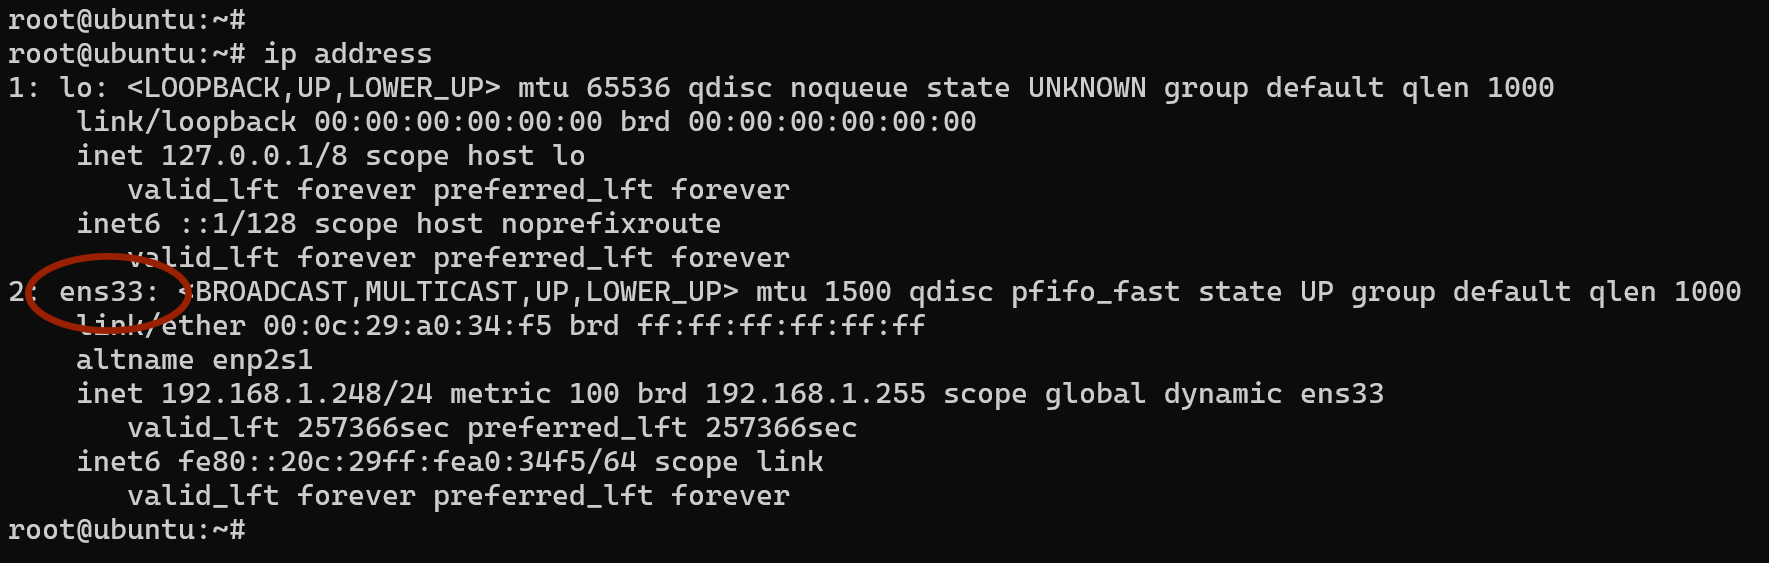
First, you need to identify the network interface you want to configure. You can list the available network interfaces on your Ubuntu Server using the following command.
ip addressThe command will display a list of network interfaces, including their names and current configurations. On my system, I have one Ethernet interface called ens33 (Ethernet interfaces typically start with en). It's currently obtaining IP addresses from a DHCP server.
Locate the Netplan Configuration File
To configure IP settings, we'll edit the Netplan configuration file located in the /etc/netplan/ directory. In this directory, you will find a file with a .yaml extension.
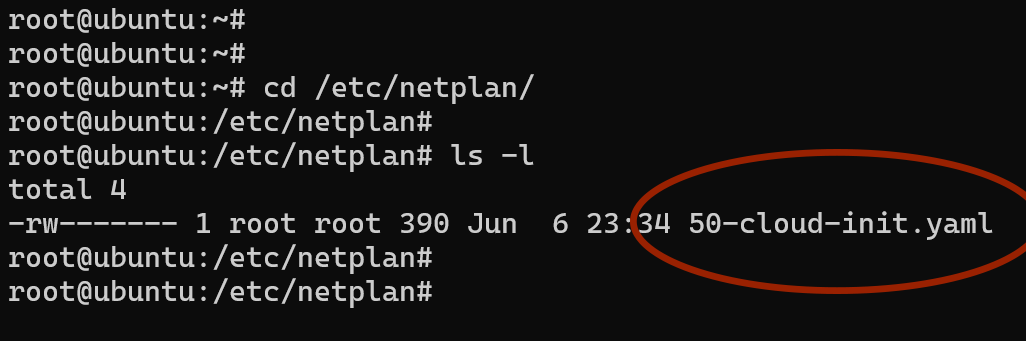
The name of the Netplan configuration file can vary depending on your system and installation method. In my case, it's named 50-cloud-init.yaml.
To edit the file, open it with a text editor like vim or nano. Below is the current configuration on my system. The ens33 interface is set to obtain IPs from the DHCP server.
network:
    ethernets:
        ens33:
            dhcp4: true
    version: 2
Modify the Netplan File to Set Static IP Addresses
Now we'll change the interface configuration file to set static IP addresses. Here's an example with static IP assignment:
network:
    ethernets:
        ens33:
            dhcp4: false
            addresses: [192.168.1.100/24]
            routes:
                - to: default
                  via: 192.168.1.1
            nameservers:
                addresses: [8.8.8.8, 8.8.4.4]

    version: 2
Here, we'll assign a static IPv4 address of 192.168.1.100, set the default gateway to 192.168.1.1, and use Google DNS (8.8.8.8, 8.8.4.4).
To apply the changes, save the file and run the sudo netplan apply command.
sudo netplan applyAssign Multiple IP Addresses
You can specify multiple IP addresses in the addresses field as a comma-separated list, as shown in the following example:
network:
    ethernets:
        ens33:
            dhcp4: false
            addresses: [192.168.1.100/24, 192.168.1.101/24]
            routes:
                - to: default
                  via: 192.168.1.1
            nameservers:
                addresses: [8.8.8.8, 8.8.4.4]

    version: 2
Alternatively, for better readability, you can separate each IP address onto a new line:
network:
    ethernets:
        ens33:
            dhcp4: false
            addresses: [192.168.1.100/24]
            addresses: [192.168.1.101/24]
            routes:
                - to: default
                  via: 192.168.1.1
            nameservers:
                addresses: [8.8.8.8, 8.8.4.4]

    version: 2
Set IPv6 Addresses
You can add both IPv4 and IPv6 addresses to the addresses field. The IPv6 default gateway is configured similarly to the IPv4 gateway. Here's an example:
network:
    ethernets:
        ens33:
            dhcp4: false
            addresses: [192.168.1.100/24]
            addresses: [fd00::1/64]
            routes:
                - to: default
                  via: 192.168.1.1

                - to: default
                  via: fe80::1
            nameservers:
                addresses: [8.8.8.8, 8.8.4.4]
                addresses: [2001:4860:4860::8888, 2001:4860:4860::8844]

    version: 2
Configure Multiple Network Interfaces
If you add a new network interface to your system, you'll need to configure it within the Netplan file as well. Here's an example where I've added a new interface called ens37:
network:
    ethernets:
        ens33:
            dhcp4: false
            addresses: [192.168.1.100/24]
            routes:
                - to: default
                  via: 192.168.1.1
            nameservers:
                addresses: [8.8.8.8, 8.8.4.4]
        ens37:
            dhcp4: false
            addresses: [192.168.100.100/24]

    version: 2
Configure Wireless (Wi-Fi) Interfaces
Remember that only wired interfaces are configured under the ethernets section. For wireless interfaces, you'll need to create a new key named wifis directly under the network key.
network:
    ethernets:
        ens33:
            dhcp4: false
            addresses: [192.168.1.100/24]
            routes:
                - to: default
                  via: 192.168.1.1
            nameservers:
                addresses: [8.8.8.8, 8.8.4.4]
    wifis:
Next, create a new key with the name of your wireless interface under the wifis section:
network:
    ethernets:
        ens33:
            dhcp4: false
            addresses: [192.168.1.100/24]
            routes:
                - to: default
                  via: 192.168.1.1
            nameservers:
                addresses: [8.8.8.8, 8.8.4.4]
    wifis:
        wlp4s0:
Then, add the wireless configuration. The following example demonstrates a typical wireless interface setup:
network:
    ethernets:
        ens33:
            dhcp4: false
            addresses: [192.168.1.100/24]
            routes:
                - to: default
                  via: 192.168.1.1
            nameservers:
                addresses: [8.8.8.8, 8.8.4.4]
    wifis:
        wlp4s0:
            dhcp4: true
            access-points:
                my_wifi_ssid:
                    password: my_wifi_password

version: 2- Replace
wlp4s0with your Wi-Fi interface name. - Replace
my_wifi_ssidwith your Wi-Fi network’s SSID. - Replace
my_wifi_passwordwith your Wi-Fi password.
Verify the Configuration
You can verify your IP settings using the following command:
ip addressTo check the IPv4 and IPv6 default gateways, use the following commands respectively:
ip route
ip -6 route
Additionally, verify the DNS name servers your server is currently using with the resolvectl status command:
resolvectlAdditional Notes
- The Netplan configuration file uses YAML data format.
- Data is represented as key-value pairs.
- YAML uses indentation to represent hierarchical structure.
- For indentation, use spaces, not tabs. Four spaces are commonly used.
- In Ubuntu netplan file
networkis the top-level key. Version,renderer,ethernets, andwifisare child keys of thenetworkkey.- Make sure to align each key and its child keys properly to avoid errors.
What Next?
That concludes this tutorial on setting static IP addresses in Ubuntu Server 24. In the next tutorial, we will learn how to set permanent static routes in Ubuntu 24.