How to Install KDE Desktop on Ubuntu 18.04 Bionic Beaver
In Linux, Desktop or Desktop Environment is a graphical user interface that allows users to interact with Linux operating system. Ubuntu 18.04 uses GNOME as its default desktop, but there are a couple of other desktops you can use. One of the most popular desktop is KDE Plasma desktop which has a clean, elegant look and similar to the Microsoft Windows desktop.
This tutorial explains how to install KDE on Ubuntu 18.04 Bionic Beaver, you can also use this guide on any previous Ubuntu version.
To install KDE on Ubuntu 18.04, open the terminal window and install the kde-plasma-desktop package using the apt command:
sudo apt-get update
sudo apt-get install kde-plasma-desktop
During the installation process, you will be prompted to select which display manager should run by default, select gdm3 and press enter to continue.

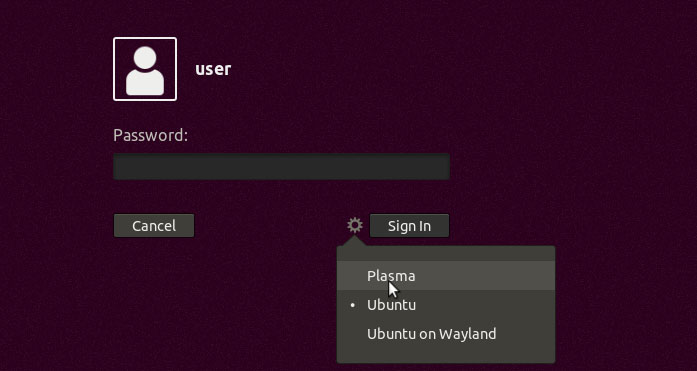
After the installation is finished, restart your Ubuntu Desktop. When you log back on, at the login screen, click on the wheel icon which you can find at the bottom beside the Sign in button.

Select: "Plasma" from the drop-down list, then login to the desktop. From now on KDE Desktop will be the default desktop on your Ubuntu 18.04 PC.

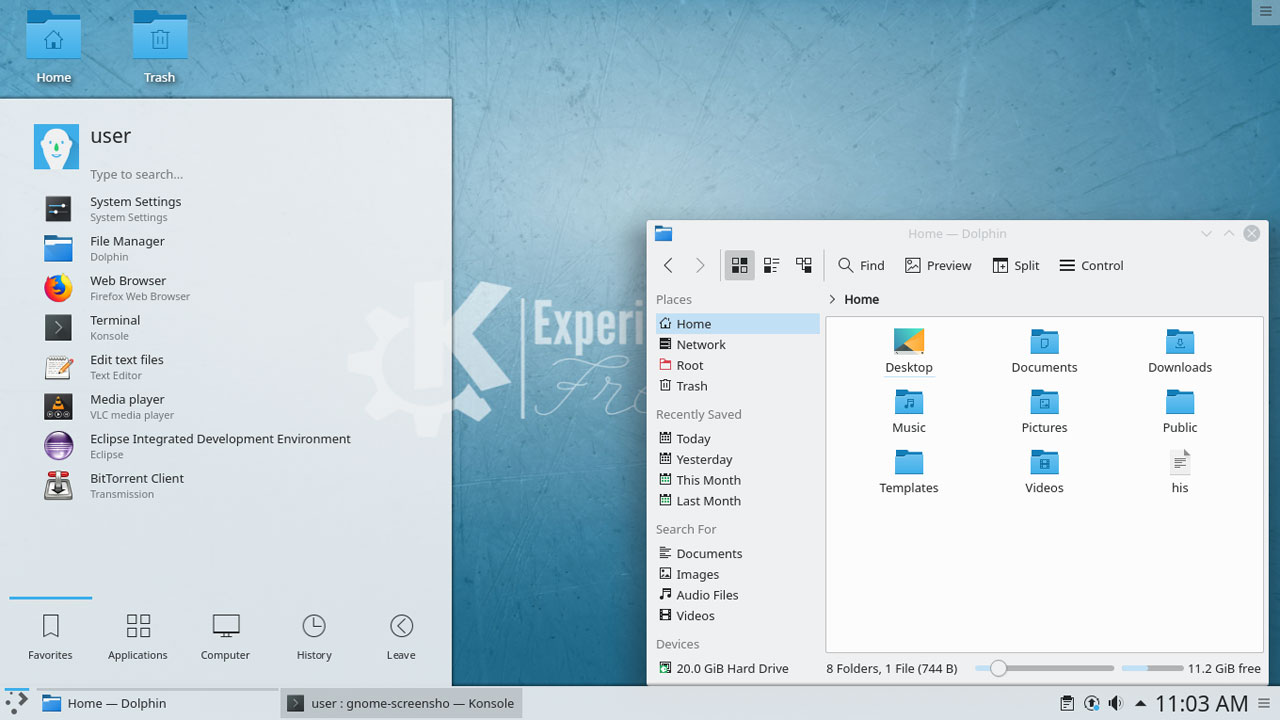
As you can see the Ubuntu KDE Plasma desktop has the traditional look and feel of a desktop with the task-bar and start button at the bottom.
If you want to switch back to the old GNOME desktop environment, click on the wheel icon from the login screen and select "Ubuntu".
Summary: Ubuntu KDE Desktop
In this tutorial we install KDE on Ubuntu 18.04 using the kde-plasma-desktop package which includes all of the necessary software components and dependencies to run KDE Plasma Desktop on Ubuntu 18.04.
The KDE project started back in 1996 by Matthias Ettrich, is designed to quality desktop environment for the Linux operating system.