How to Setup FileZilla Server on Windows 10/Windows Server
FileZilla Server is really easy to install and configure. It provides a fully functional and easy-to-use FTP server for Windows operating system.
The first thing we need to do is download FileZilla server for Windows 10.
In your browser, go to https://filezilla-project.org. Click Download FileZilla Server and it will bring us to the download page.

After the download has finished, run the setup and start the installation process and Continue with default Standard install type.
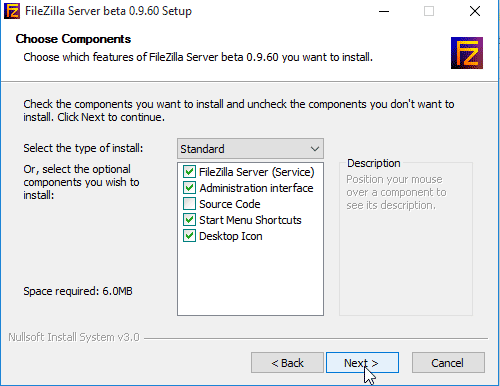
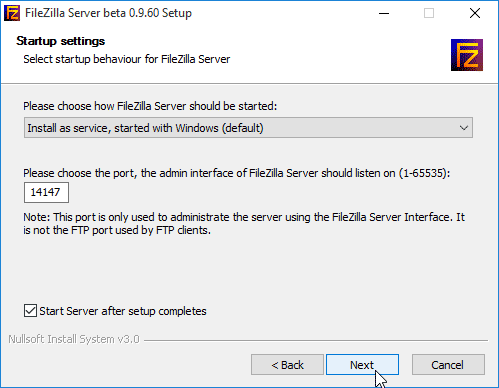
Leave the Administrative port default. When choosing how FileZilla server should start, Select "Install as service, started with Windows", if you want to start the FTP server automatically at Windows startup.
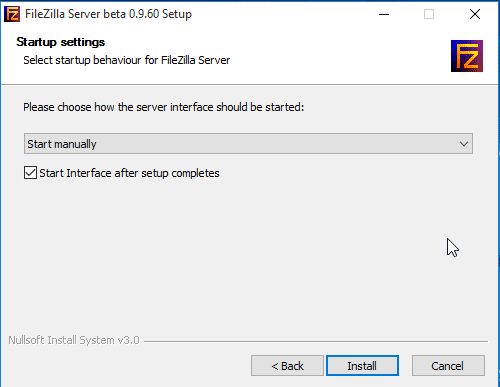
Select, "Start manually" option for the Server GUI(Interface).
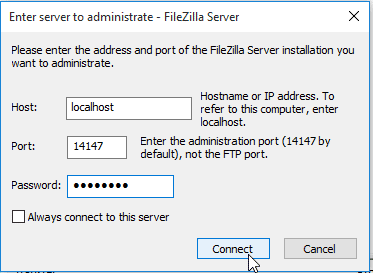
When launched for the first time, it will ask you to configure the FTP server. Leave the Host (127.0.0.1) and admin port (14147) as default. Type a new password (You will use this password for administering the FileZilla FTP server) and Press Connect.
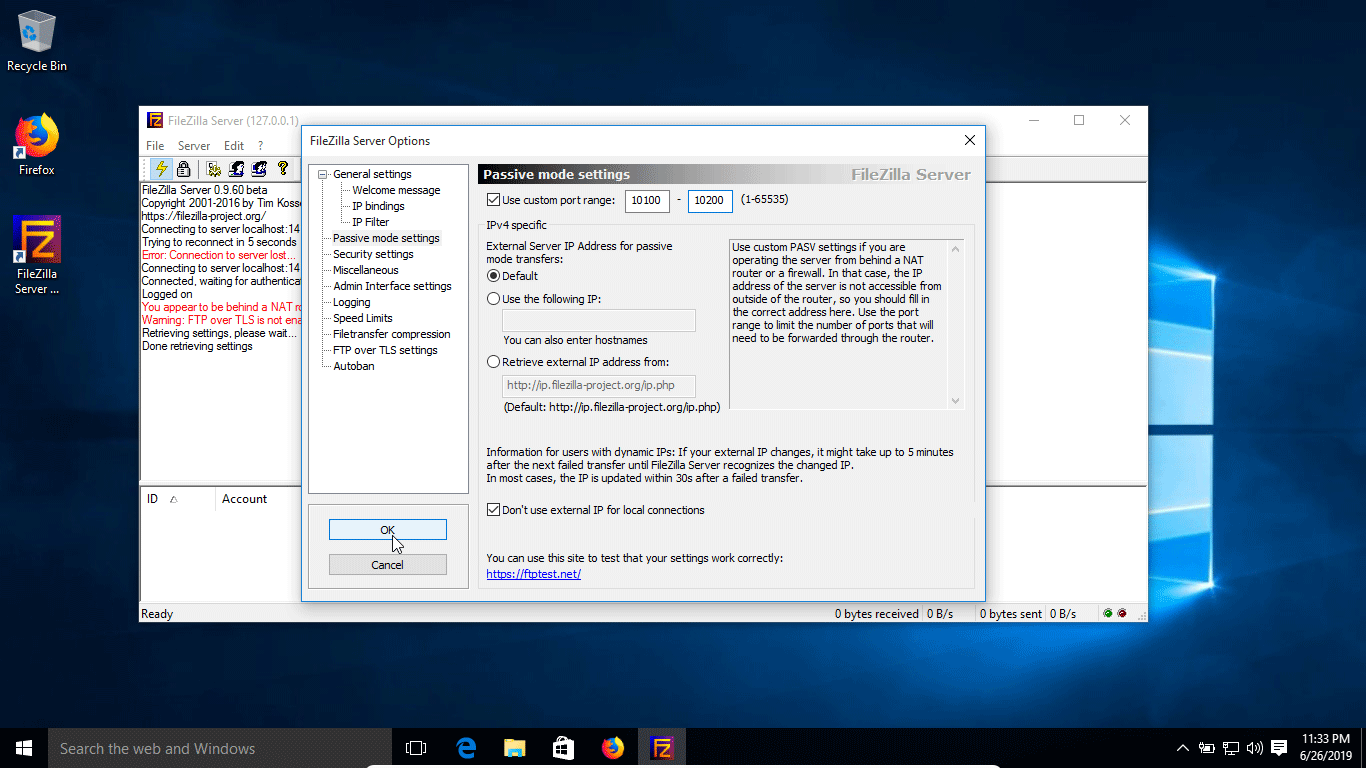
Next, we need to configure the passive mode settings. Go to Edit > Settings > Passive mode settings, set the custom port range from 10100 to 10200.
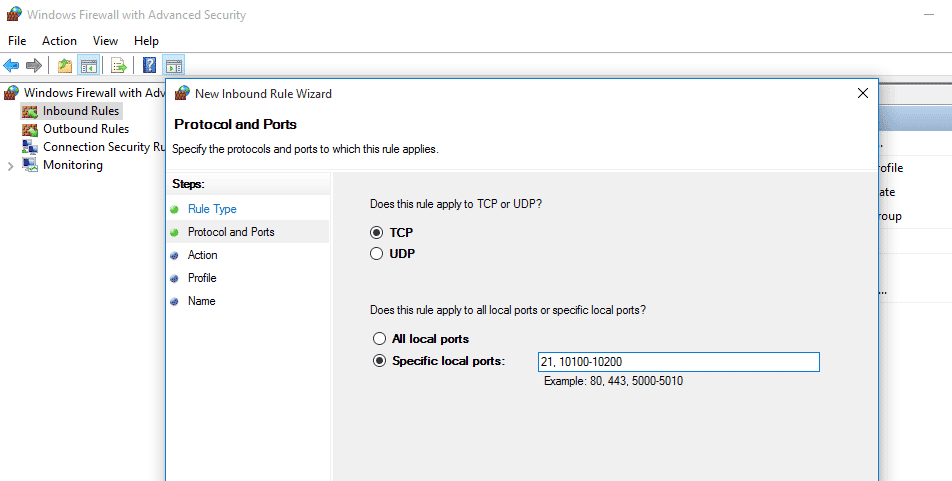
After that, open the Windows Firewall and create a new Inbound rule to allow FTP port 21 and passive port range (10100-10200).
Create a user account
Now the FileZilla FTP Server has been installed on Windows 10, we need to create an FTP user that can log in to the server. To set up an FTP user in the FileZilla server, complete the following steps:
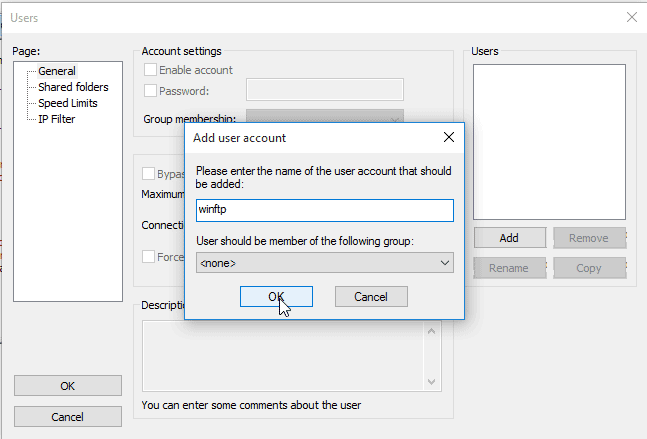
Click on the user icon (Fourth icon from the left). Then, click on the add button and enter the name of the user account to be created and press OK.
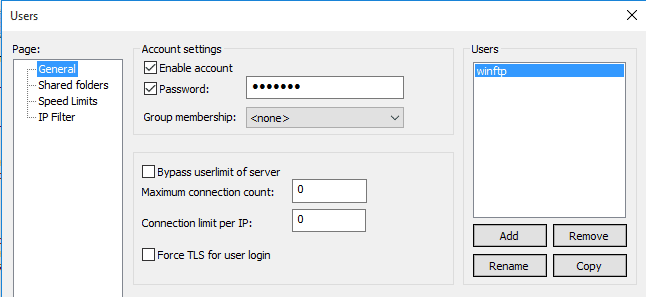
After you have created the user, check on the Password option and Specify a password for the user.
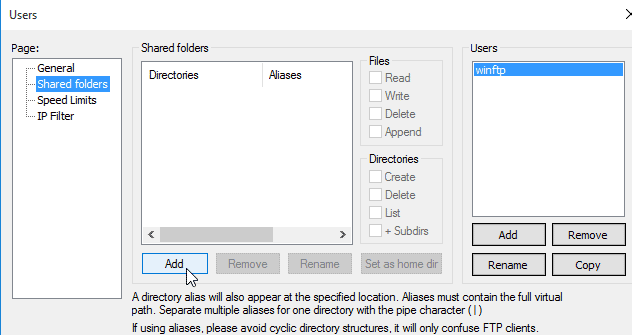
We also must specify a home directory for this user, Go to the Shared folders section, click on the add button and browse the folder(s) you want access over the FTP.
That is all you need to setup FTP Server on Windows 10/Server.
Note that, during the installation, if FileZilla FTP service configured to start manually, you need to start the server from the interface.
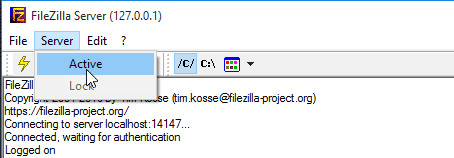
Open the FileZilla server interface. Then, select Server > Active, as shown in following screenshot, to start the FTP server.
Alternatively, we can use Windows CMD to start/stop FileZilla FTP service:
sc start "FileZilla Server"
sc stop "FileZilla Server"
And that's it! We've learned how to setup FTP server on Windows 10.