How to Install Telnet Command on Windows 11 & Windows 10
Telnet is a super useful command-line tool for testing connectivity, troubleshooting, or even managing network devices.
However, on Windows 11 and Windows 10, the Telnet client isn’t enabled by default. That’s why you might see errors like 'telnet' is not recognized as an internal or external command in CMD or The term 'telnet' is not recognized as the name of a cmdlet in PowerShell when you try to use it.
But don’t worry—it’s easy to fix. Just enable the Telnet client with the following steps
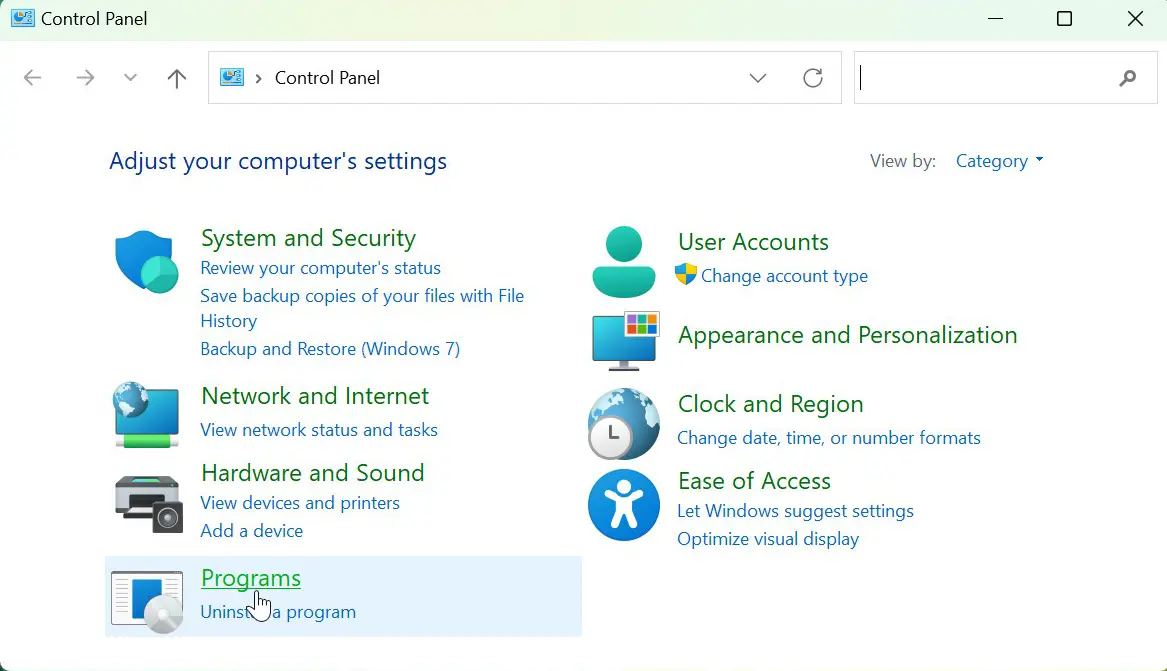
- Click the Start button, type "Control Panel", and open it.
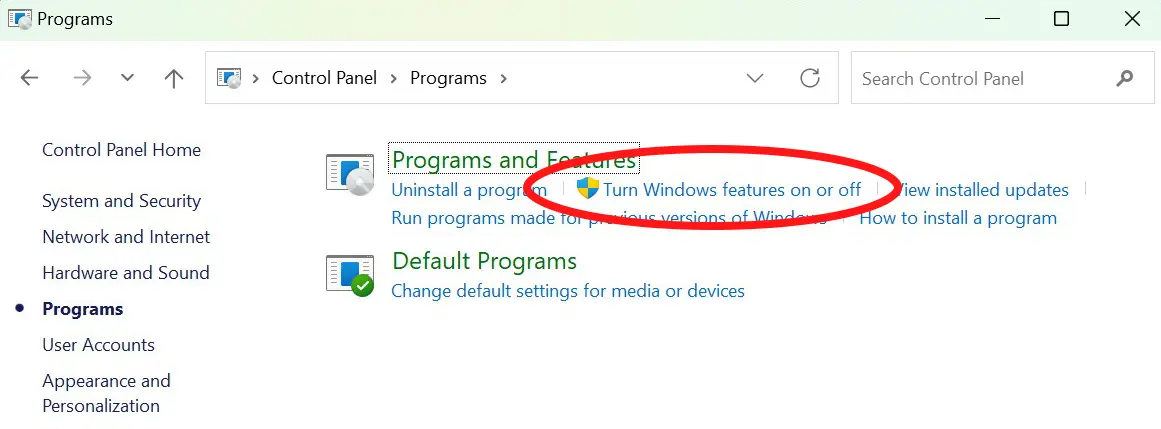
- In the Control Panel, click on Programs > Turn Windows features on or off.
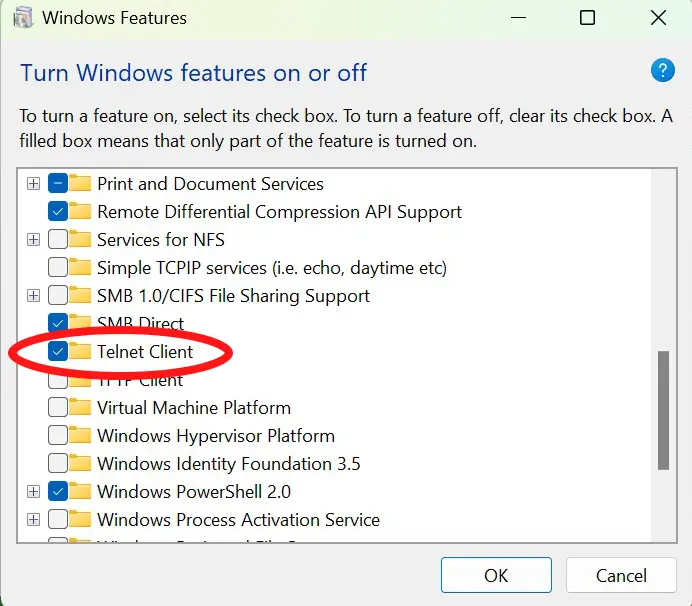
- Scroll down and check Telnet Client.
- Click Ok to install Telnet.
The Telnet Client feature provides the telnet command for Windows 11, Windows 10, and Windows Server. Just make sure to restart the Command Prompt before running the telnet command again.
Check Open Ports with the Telnet Command
Check if Port 21 is Open on the Server at 192.168.1.10:
telnet 192.168.1.10 21Check if Port 22 is Open on the Server at 192.168.1.10:
telnet 192.168.1.10 22