How To Mount ISO Files in Windows 10/11
In the following tutorial, you will learn how to mount ISO files in Windows 10/11 operating system. You will also learn how to create an ISO file directly from a folder on your computer.
Both Windows 10 and Windows 11 natively support mounting ISO files, so you no longer need third-party software to mount ISO files.
To mount an ISO file, right-click the ISO and choose Mount from the contextual menu that appears (you can also just double click an ISO image to open it in Windows Explorer and view its contents).
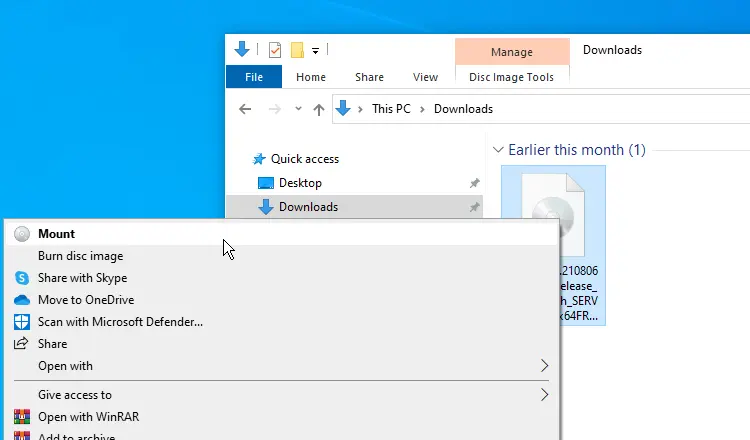
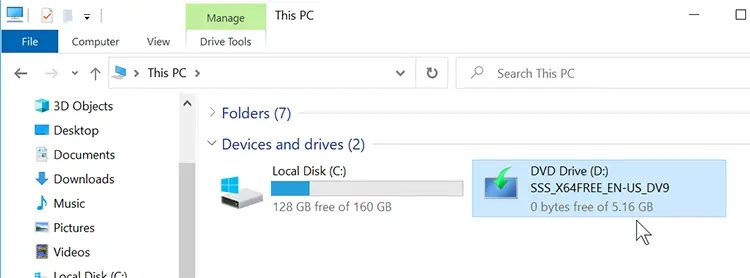
Windows will mount the ISO image as a virtual DVD drive. You will see the mounted drive under This PC section of the Windows Explorer.
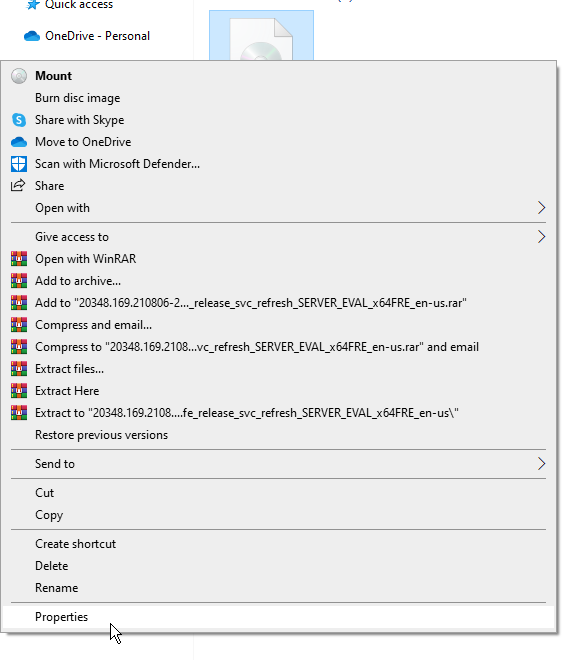
If you don't see the Mount option in the right-click menu, then do the following: right-click the ISO and choose Properties.
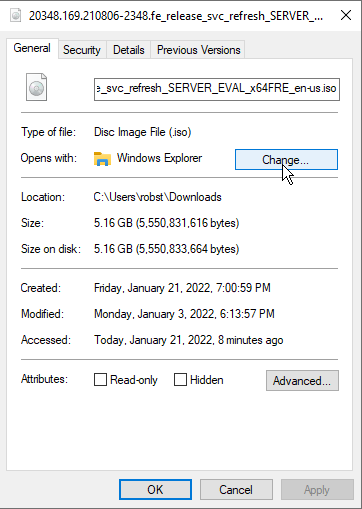
On the General tab, click Change and then choose Windows Explorer as the default app to open ISO files.
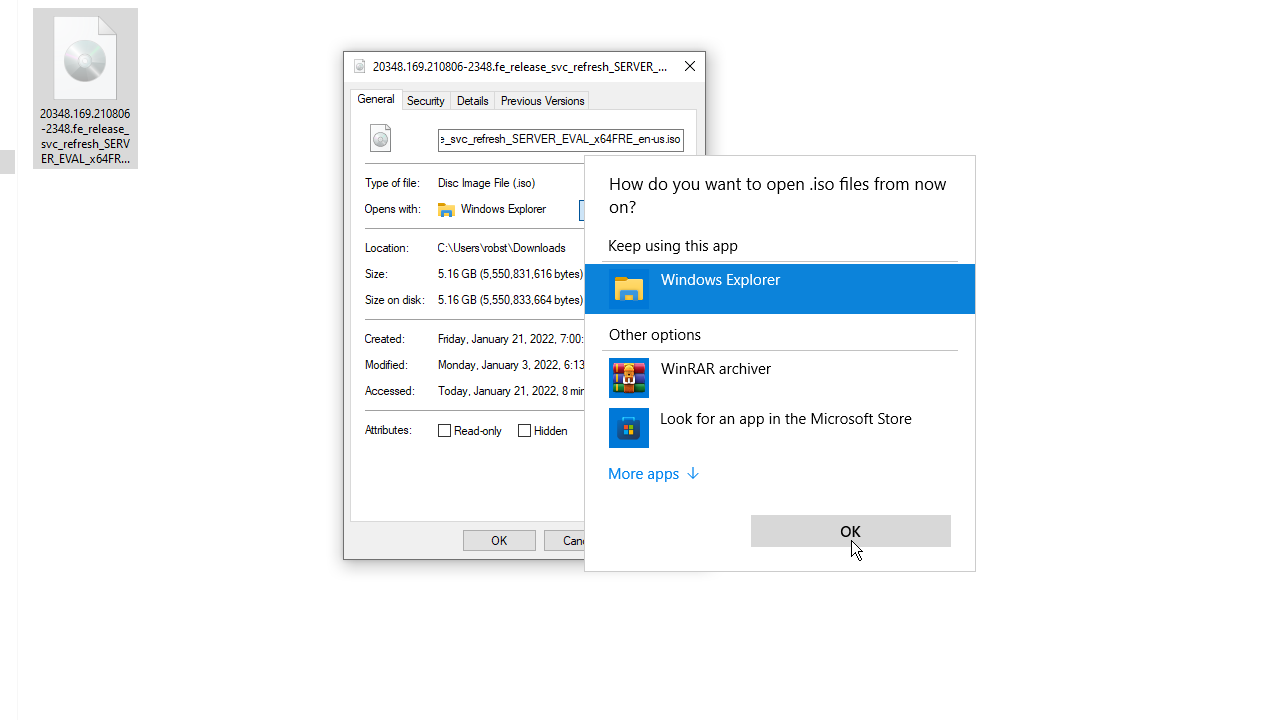
Inside the virtual DVD drive, you can view the contents of the ISO. However, you can't edit or delete its contents. If you want to edit the ISO, you need to copy its contents to a different folder, edit it and then create a new ISO from the folder.
To unmount the drive, in the File Explorer, go to This PC and right-click the virtual DVD drive.
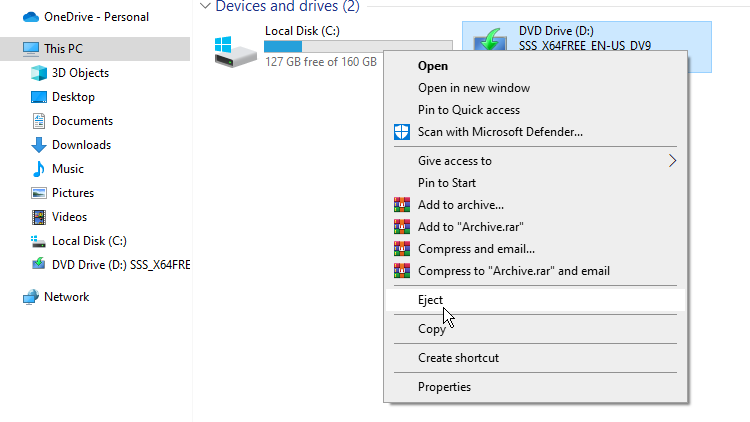
Then click Eject in the menu that appears, as shown in the above screenshot.
Creating ISO Files
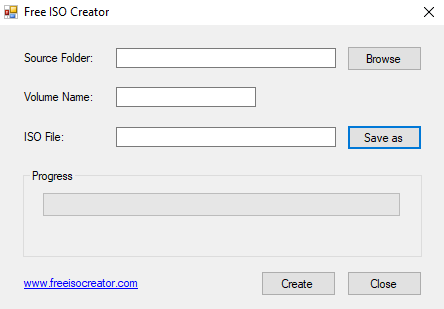
If you need to create an ISO file, you need to install ISO creator software. There is a lot of free software for creating ISO files, such as freeisocreator and wincdemu.
The following screenshot shows the freeisocreator interface:
If you install wincdemu, the "build an ISO image" option will be available in the context menu of the Explorer.
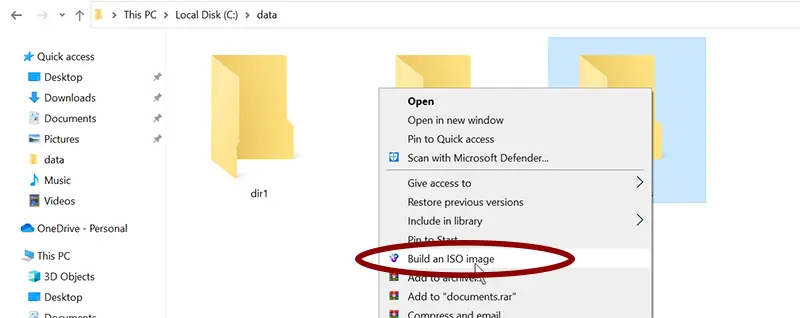
That enables you to convert any folder on your PC to an ISO file very quickly.