How To Open a Port in Windows Firewall
In the following tutorial, you will learn how to open a port in Windows Firewall. You can use this guide to open a port in Windows 11/10 or Windows Server.
To show how it works, we will create a Firewall rule that opens TCP port 80.
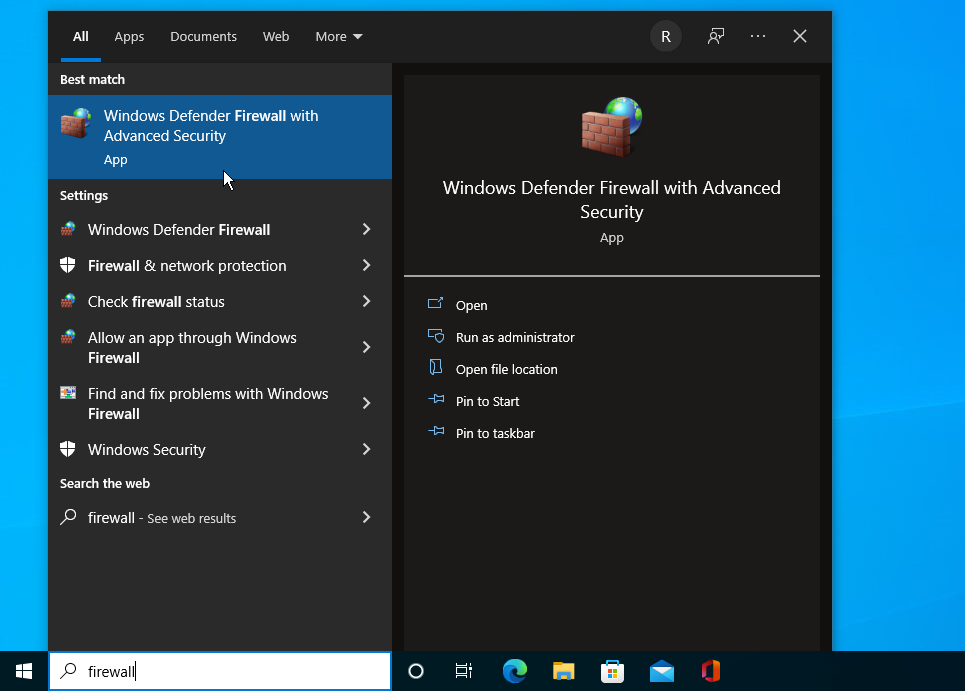
Open the Firewall: click the start button and type Firewall, and then choose Windows Defender Firewall with Advanced Security from the search result.
![Windows Defender Firewall with Advanced Security](https://storage.googleapis.com/static.configserverfirewall.com/images/windows10/firewall/start-windows-firewall.webp)
You will see a window like the following:
![Create new inbound rule in Windows firewall](https://storage.googleapis.com/static.configserverfirewall.com/images/windows10/firewall/windows-firewall-new-rule.webp)
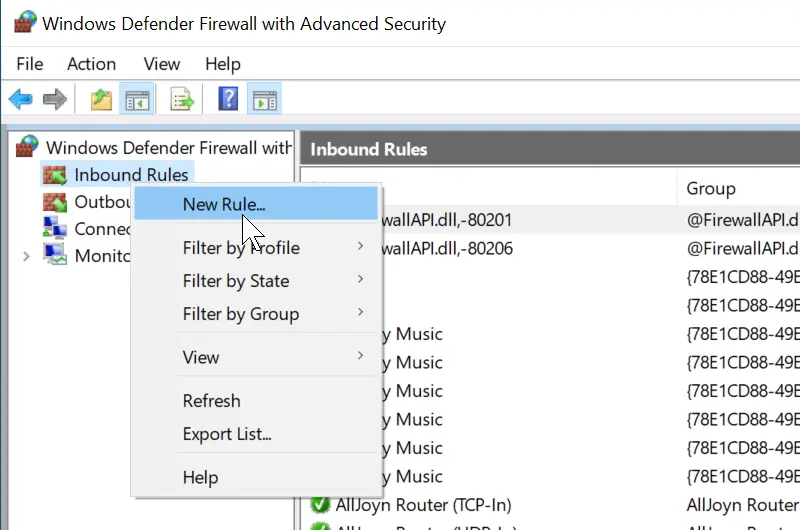
To open a port, go and right-click on Inbound Rules in the left pane and then click New Rule in the menu that appears.
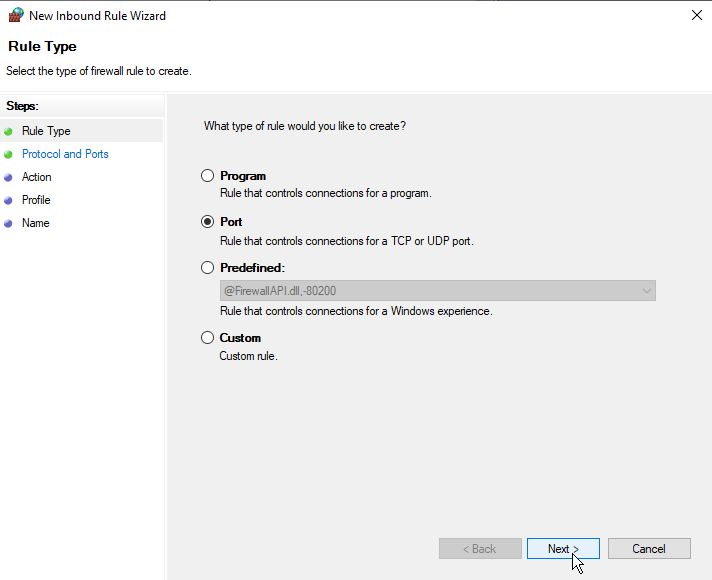
The New Inbound Rule Wizard appears. Select Port as the type of rule you want to create.
![Windows Firewall open port](https://storage.googleapis.com/static.configserverfirewall.com/images/windows10/firewall/windows-firewall-open-port.webp)
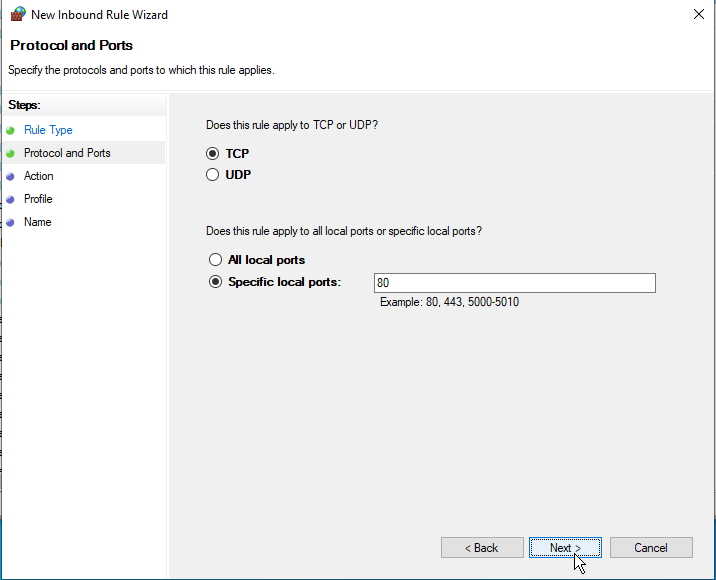
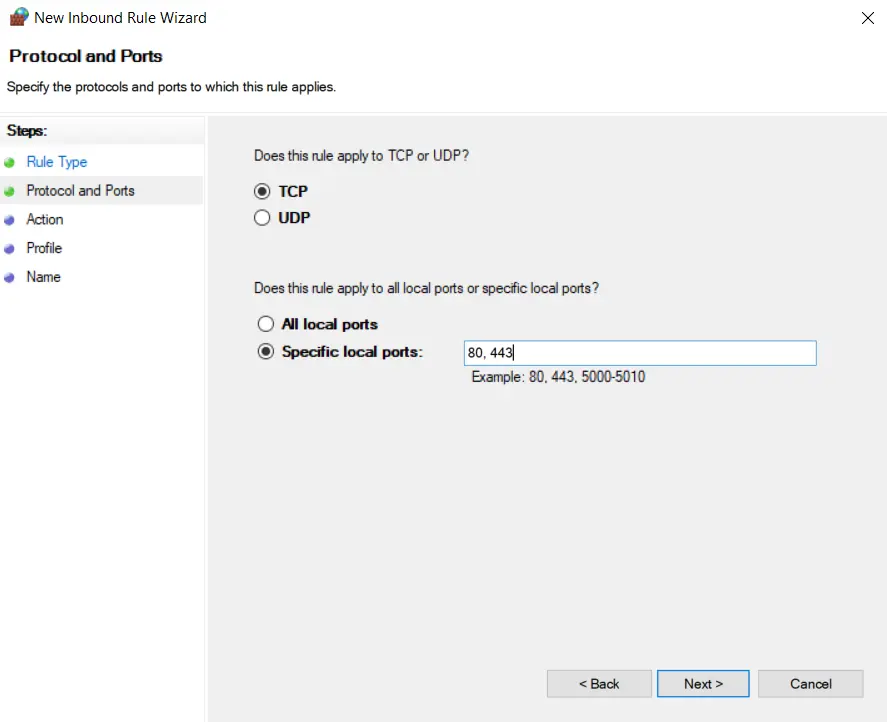
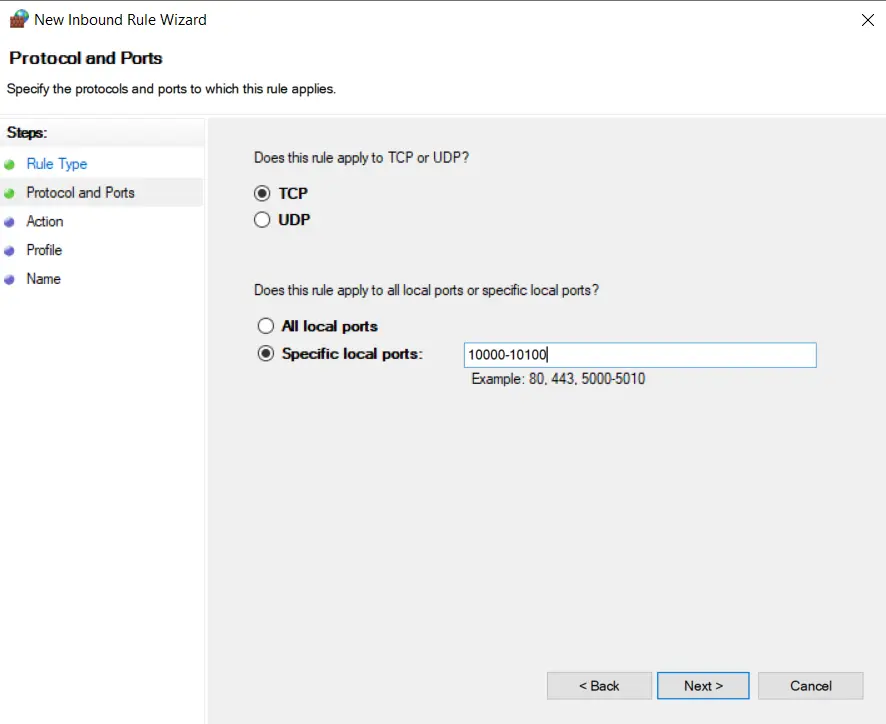
In the next window, choose the protocol and then type the port number in the Specific local ports text box. After that, click Next.
![Windows Firewall protocol and ports](https://storage.googleapis.com/static.configserverfirewall.com/images/windows10/firewall/type-the-port-number.webp)
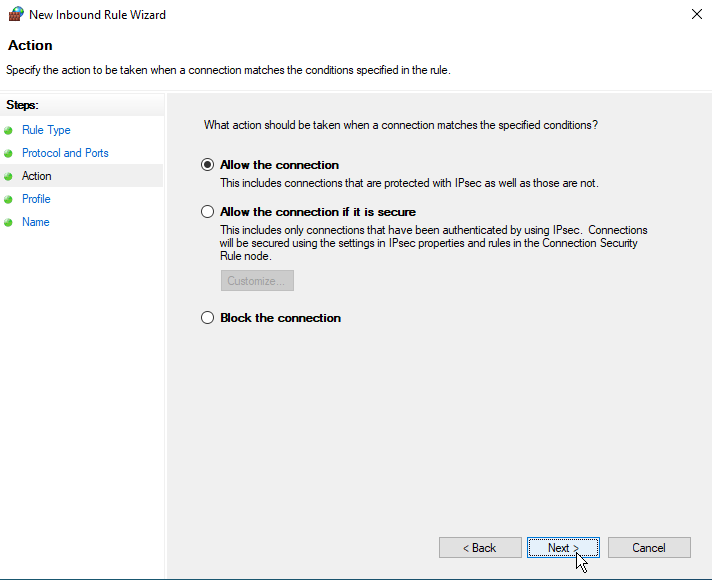
On the Action screen, select Allow the connection and then click Next.
![Windows Firewall allow connection](https://storage.googleapis.com/static.configserverfirewall.com/images/windows10/firewall/firewall-allow-the-connection.webp)
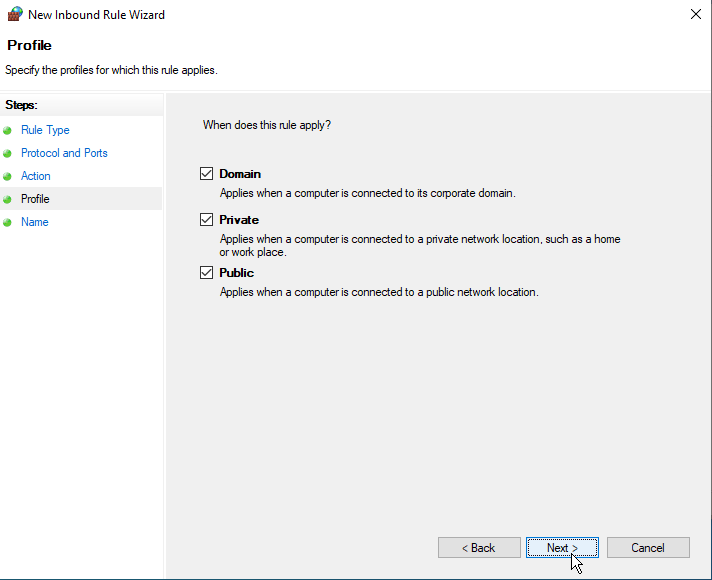
In the Profile screen, select the network profile (Domain, Private, and Public).
![Specify the profiles for which this rule applies](https://storage.googleapis.com/static.configserverfirewall.com/images/windows10/firewall/specify-the-profiles-for-which-this-rule-applies.webp)
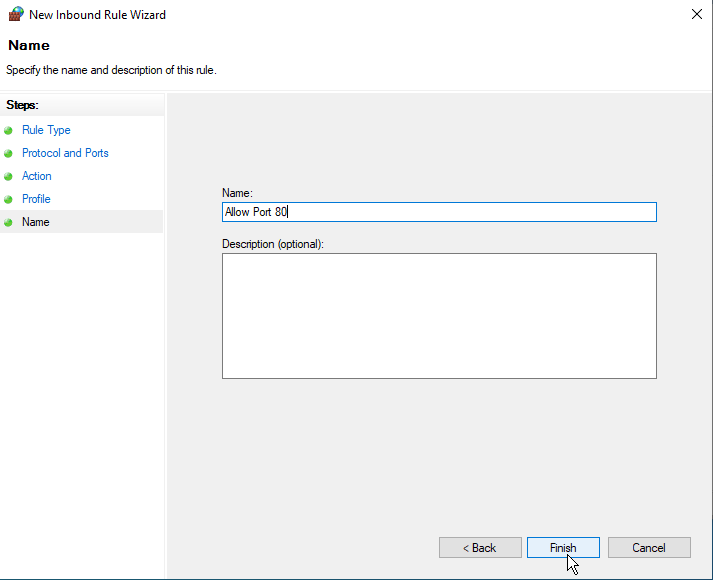
Finally, give a name to the rule and click Finish.
![open port 80 from windows firewall](https://storage.googleapis.com/static.configserverfirewall.com/images/windows10/firewall/name-the-firewall-rule.webp)
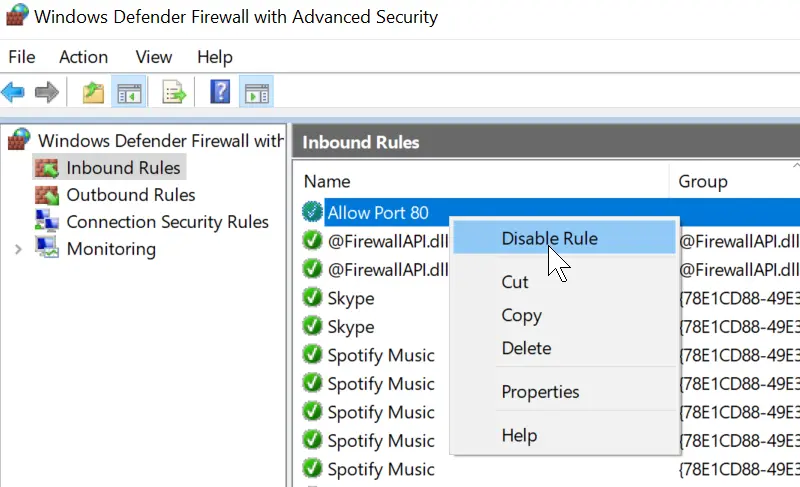
In the Inbound Rules section of the Windows Firewall, you will see all of the existing inbound rules, including the one you created to open a port.
![how to open a port in windows](https://storage.googleapis.com/static.configserverfirewall.com/images/windows10/firewall/open-a-port-in-windows.webp)
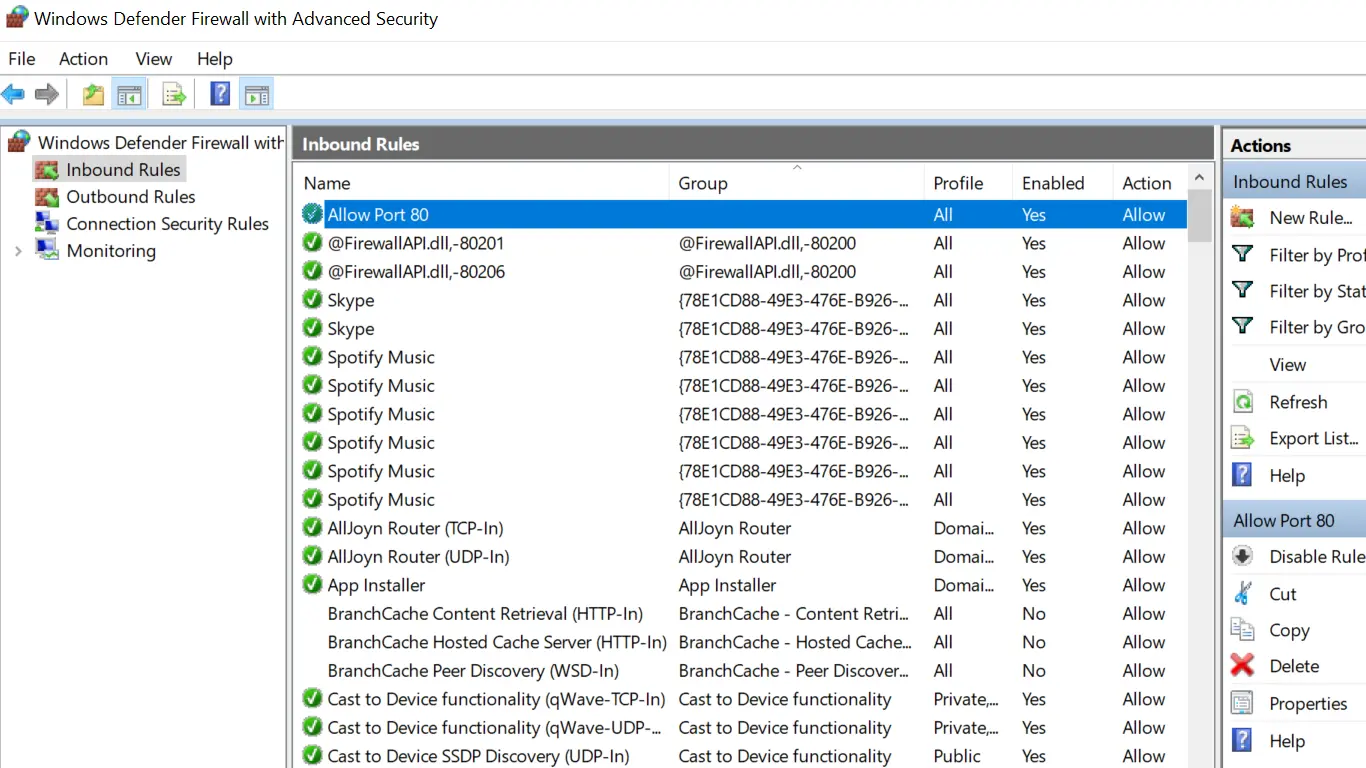
To disable a Firewall Rule, right-click and choose Disable Rule.
![Disable a firewall rule in Windows 10](https://storage.googleapis.com/static.configserverfirewall.com/images/windows10/firewall/disable-a-firewall-rule.webp)
Open Multiple Ports
To open multiple ports at once, separate the numbers by using commas.
![Open Multiple Ports in Windows Firewall](https://storage.googleapis.com/static.configserverfirewall.com/images/windows10/firewall/open-multiple-ports.webp)
To open a range of ports (from 10000 to 10100 ) at once, use the following format:
![open a range of ports at once](https://storage.googleapis.com/static.configserverfirewall.com/images/windows10/firewall/open-a-range-of-ports.webp)
Only Allow Connections From Specific IP Addresses
You could modify firewall rules to allow users from specific IP addresses.
To do this, double-click the rule to open Properties and then go to the Scope tab.
![Only Allow Connections From Specific IP Addresses](https://storage.googleapis.com/static.configserverfirewall.com/images/windows10/firewall/allow-users-from-specific-ip-addresses.webp)
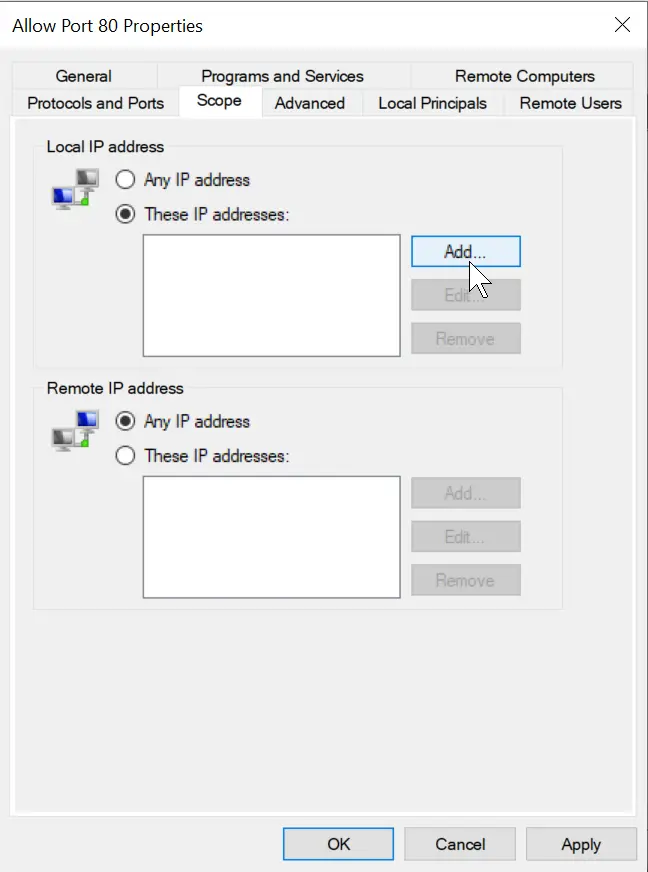
Under the Local IP address section, switch to the These IP addresses radio button and click on the Add button.
![specify the IP Address you want to allow](https://storage.googleapis.com/static.configserverfirewall.com/images/windows10/firewall/open-a-port-on-specific-ip-address.webp)
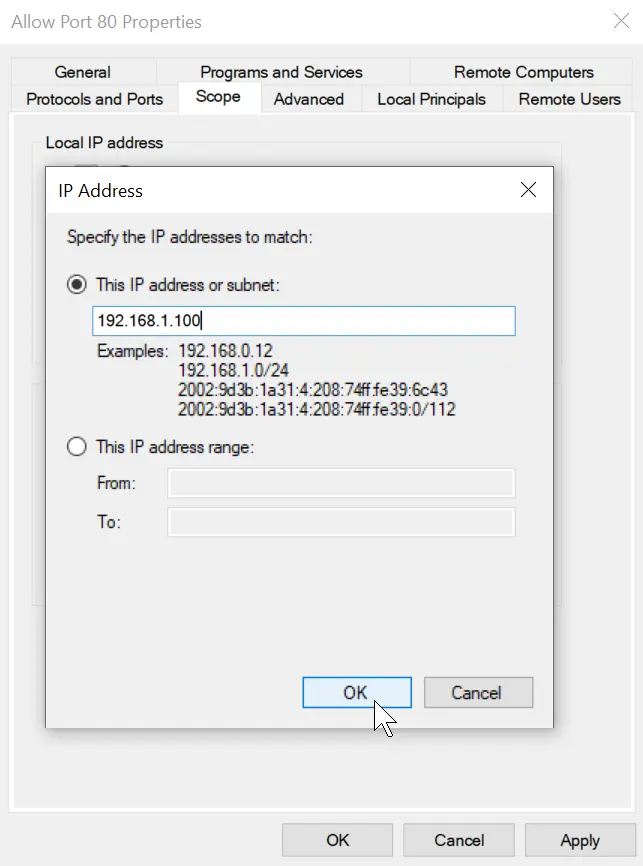
A window appears, in which you can specify the IP Address you want to allow. Click the Add button again to add another IP address or subnet.