How to Restore the Old Right-Click Menu in Windows 11
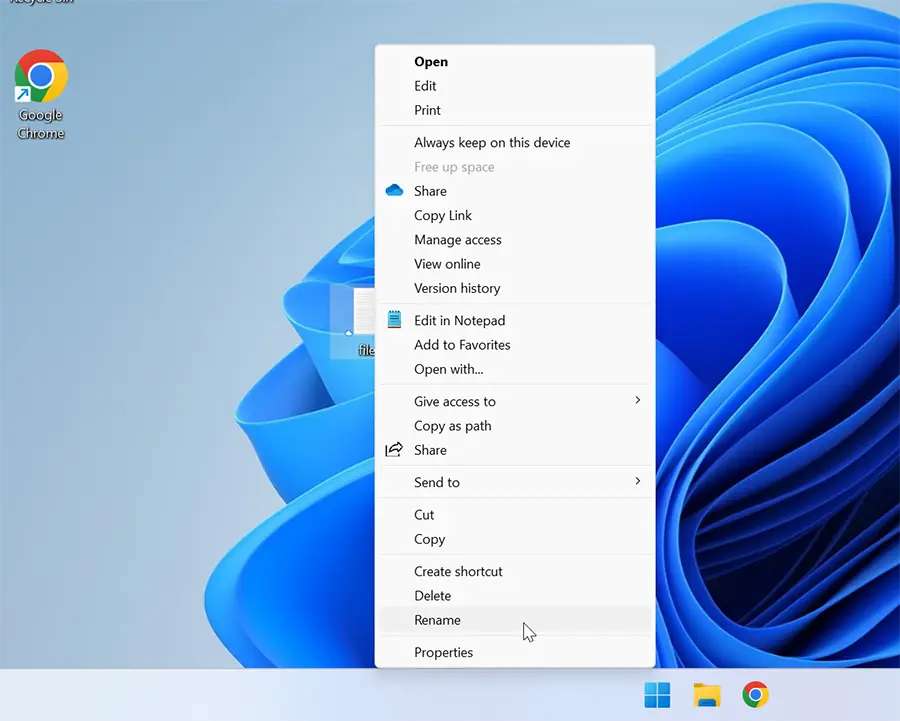
The right-click menu, also known as the context menu, in Windows 11 can feel more hidden and less intuitive compared to the old right-click menu from Windows 10 and earlier versions.
If you prefer the old context menu, there are ways to bring it back. In this tutorial, we'll show you two methods to restore the old right-click menu in Windows 11, making your user experience more familiar and efficient.
Method 1: Temporary Access (Quick & Easy)
Option one is super quick and simple: hold down the Shift key while you right-click on a file, folder, or the desktop. This will bypass the new menu and show you the old one directly.
Method 2: Permanent Access (Registry Edit)
To make the old right-click menu permanent, we need to make a small tweak in the Windows Registry. The following steps show how to do it:
- Click the Windows Start button and search for "regedit." In the search results, right-click "Registry Editor" and choose "Run as administrator."
- In the Registry Editor, navigate to the following location:
HKEY_CURRENT_USER\Software\Classes\CLSID\. - Next, right-click on
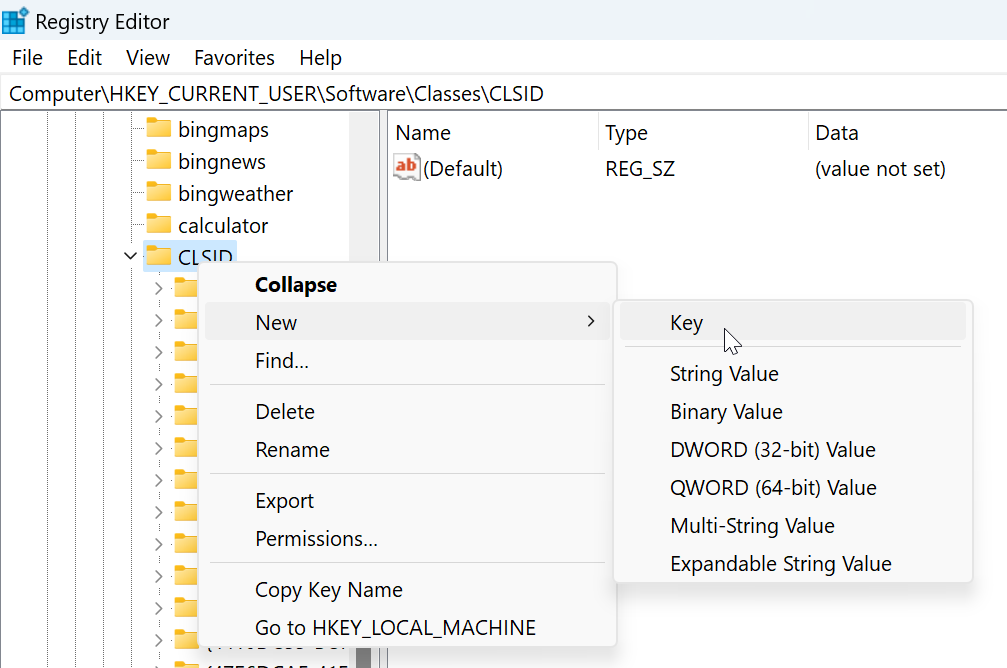
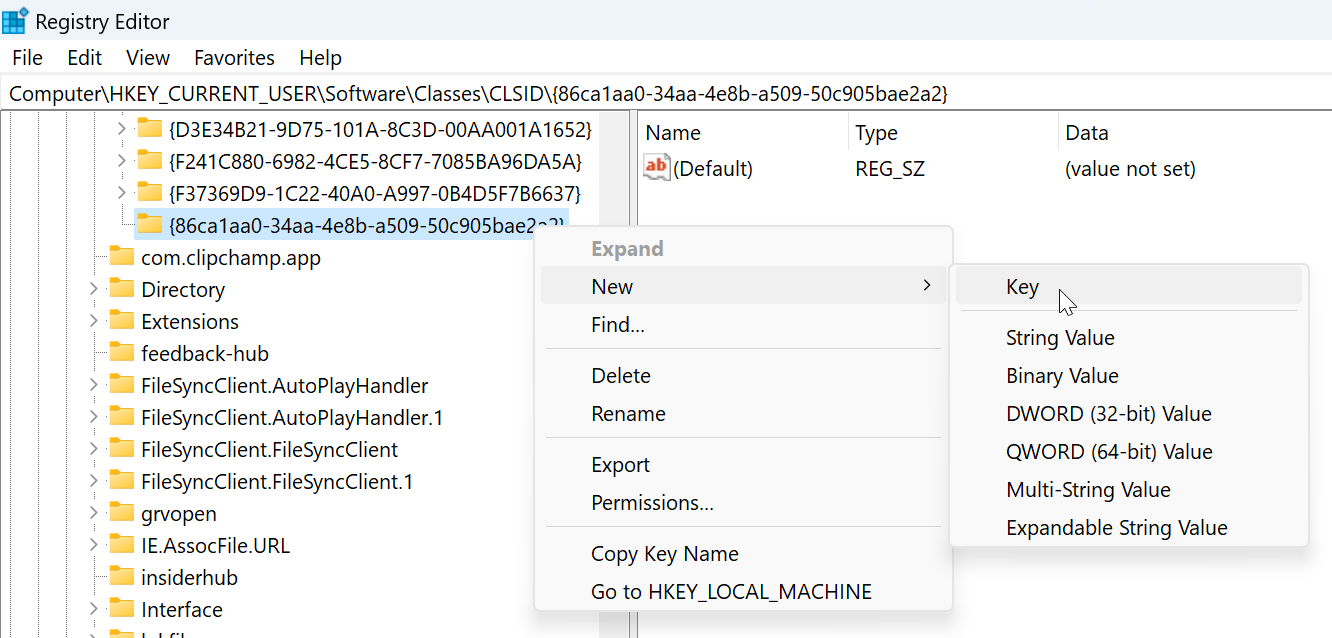
CLSID, select "New", and then click on "Key". Name the new key as follows:{86ca1aa0-34aa-4e8b-a509-50c905bae2a2}. - Next, right-click on the newly created key, select "New", and then click on "Key". Name the new subkey
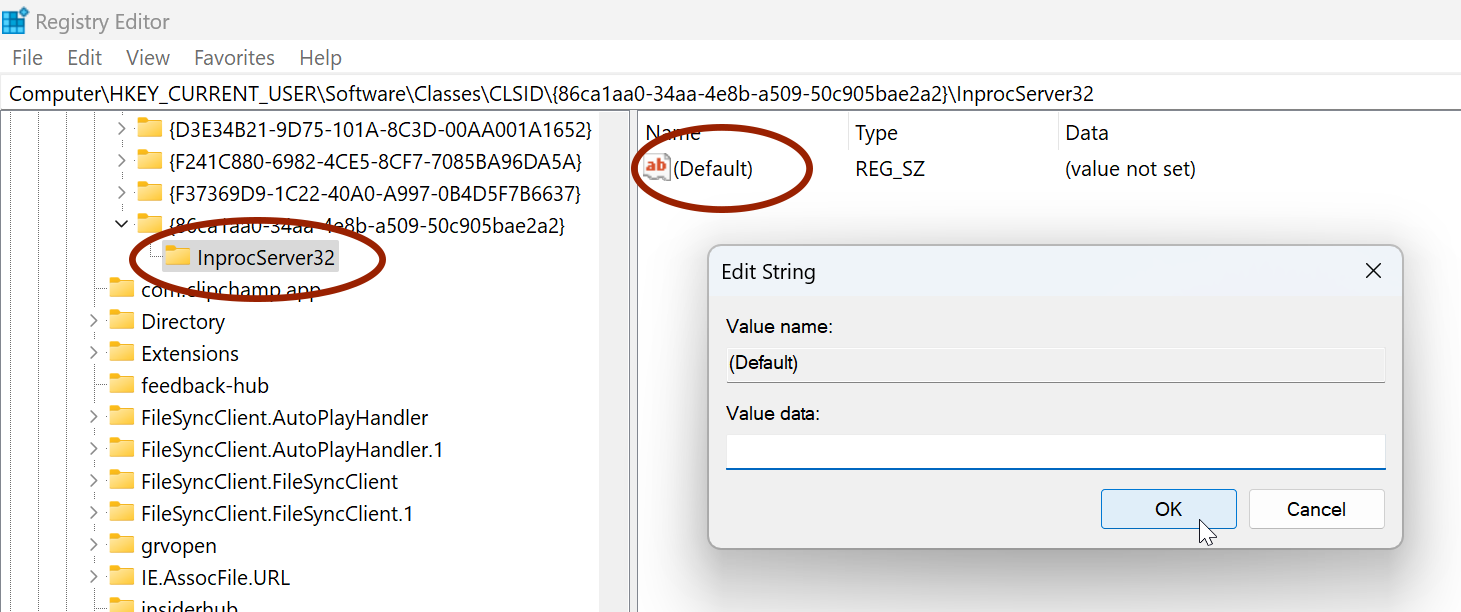
InprocServer32. - Next, double-click on the default value in
InprocServer32and make sure the value data is empty. - After that, restart the computer.
After restarting, you should see the old context menu appear by default when you right-click on files, folders, or the desktop.
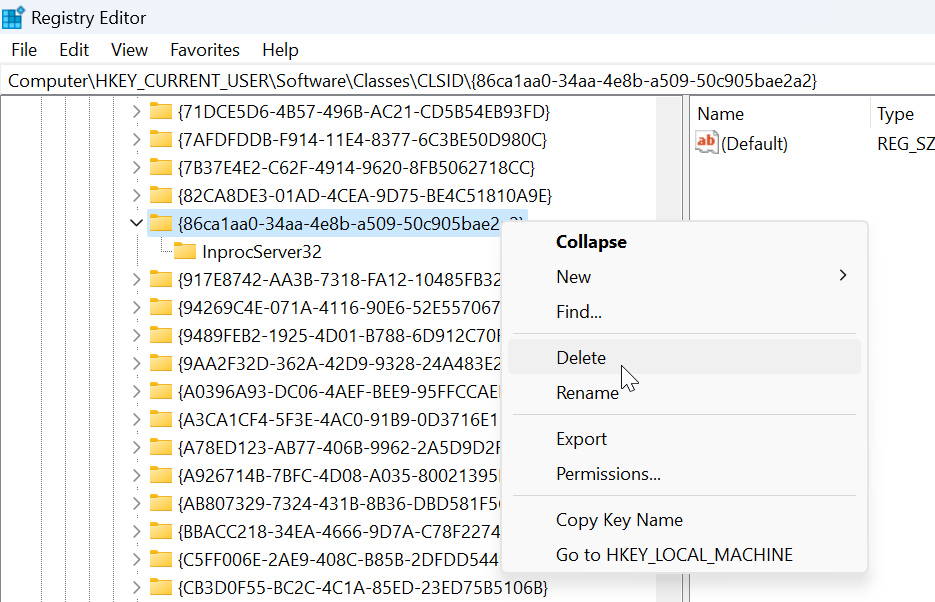
If you want to revert to the default Windows 11 right-click menu, just delete the key we created.
